
Overview#
Following the series on Git, this series introduces Github’s basic function as a remote repository, and Github’s feature called Github Actions for Continuous Integration / Continuous Delivery. In the Git posts, everything discussed was only taking place locally on my machine, meaning the repo, commits, branches, etc all lived exclusively locally on my laptop. Aside from the obvious risk of having no backups, this limits me to having to work on that repo only from a single machine, and provides no way for anyone else to collaborate with me on my terrible code. This is where remote repositories come in.
Github #
There are multiple ways to provide remote Git repositories, and multiple companies which have offerings to do so. Github is one such company that provides cloud-based Git repositories and associated features and tools for collaboration, codebase management, bug tracking, etc.
When people say Github, colloquially they probably mean the fundamental remote repository offering which takes local repos and makes them publicly or privately viewable and available for workflows. There is a huge collection of repos contributed for all sorts of purposes there, including this very blog. Get started by creating a free-tier account at Github.
Creating Github Repos#
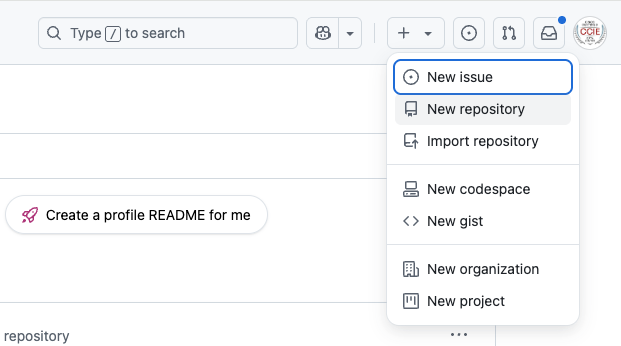
Github repos are created through the web UI.
Give the repo a name, and use the radio buttons to decide whether this is publicly viewable, or only privately viewable. Emphasis on viewable since permissions to edit a repo by anyone other than the an authenticated repo owner/contributor are a different story. By convention, a file called README.md should be added to the repo for describing and documenting what’s within. .md files are the extension for text in a typesetting language called Markdown, but I won’t do that right now.
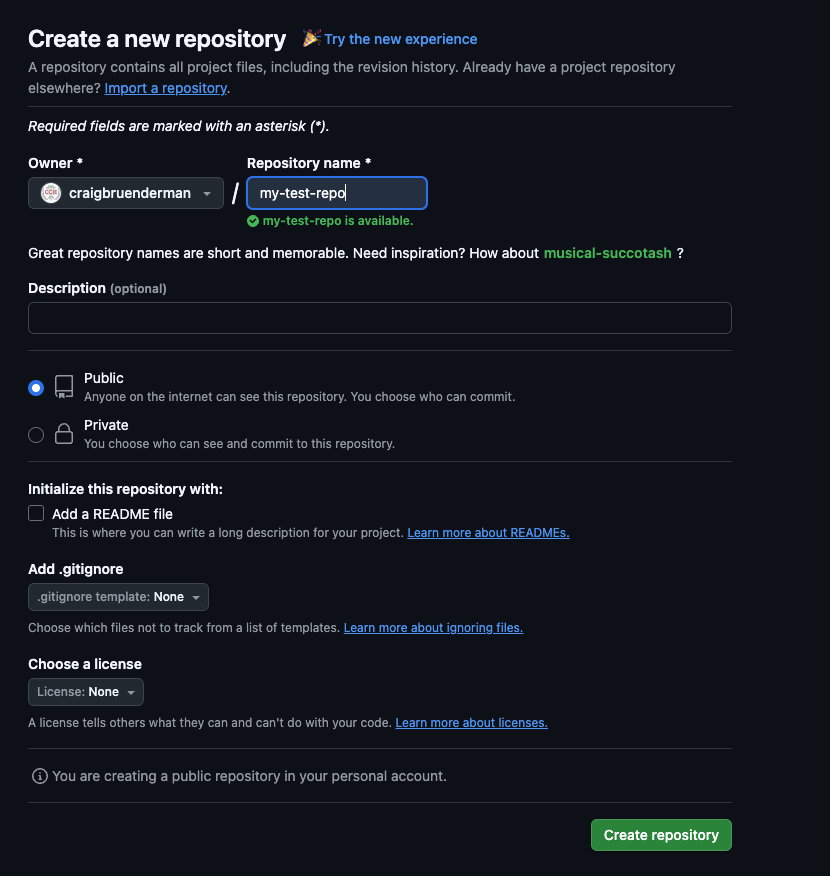
As evidenced by the switch to dark mode, things are getting spicy now. After creating the Github repo, We’re presented with options about how to populate this remote repo, depending on the order you are working in.
From Scratch#
If starting with a blank slate and no local version of the repo exists yet, use this procedure.
# Create local dir for the local repo
mkdir my-test-repo
cd my-test-repo
# Populate README.md with something
echo "# my-test-repo" >> README.md
# Initialize local Git repo
git init
# Stage README.md file
git add README.md
# Commit the staged file
git commit -m "first commit"
# Forcible change the branch name from master to main
git branch -M main
# Establish the link between this local repo and the remote Github repo
# The name 'origin' is just a common convention used
git remote add origin git@github.com:craigbruenderman/my-test-repo.git
# Sync local to remote, using that 'origin' label representing the remote branch
# and 'main' which represents the local branch you're pushing
git push -u origin main
I guess that warning is my hint to adopt main as my default branch name. This is fixed by git config --global init.defaultBranch main.
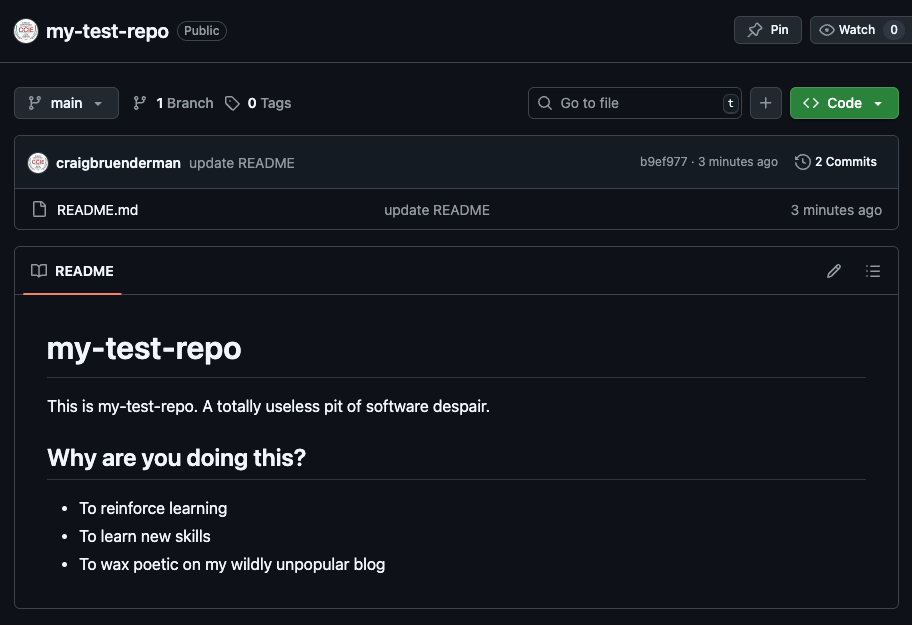
If I now pop back over to Github, I see that there is one branc named main, with 1 commit 9 minutes ago, and that there is 1 file in the Github repo called README.md. So the remote Github repo is currently identical to the local Git repo, exactly as I wanted. You can also see the large test my-test-repo. This is actually being rendered from the contents of the README.md file. We echoed # my-test-repo to that file, which in Markdown is interpreted as an HTML h1 tag. Github renders the contents of README.md when viewing a repo so that’s where details of the purpose and usage of repos are typically stored.
After editing README.md in my local repo, I use normal Git commands to commit and push it, synching those local changes to the remote Github repo.
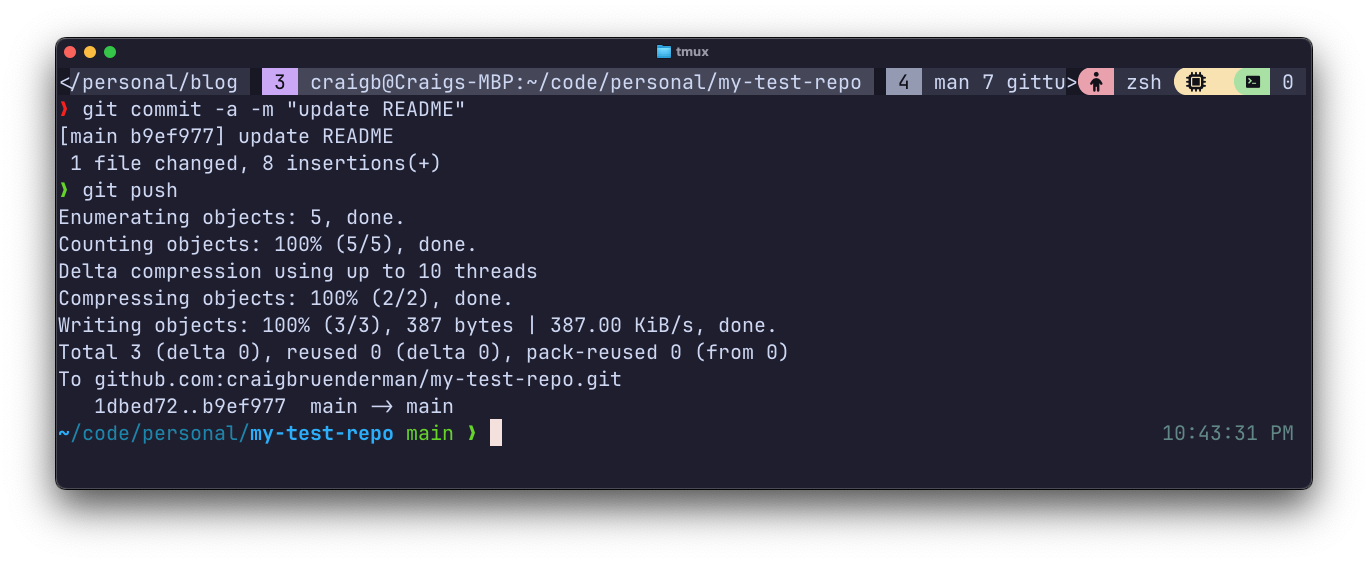
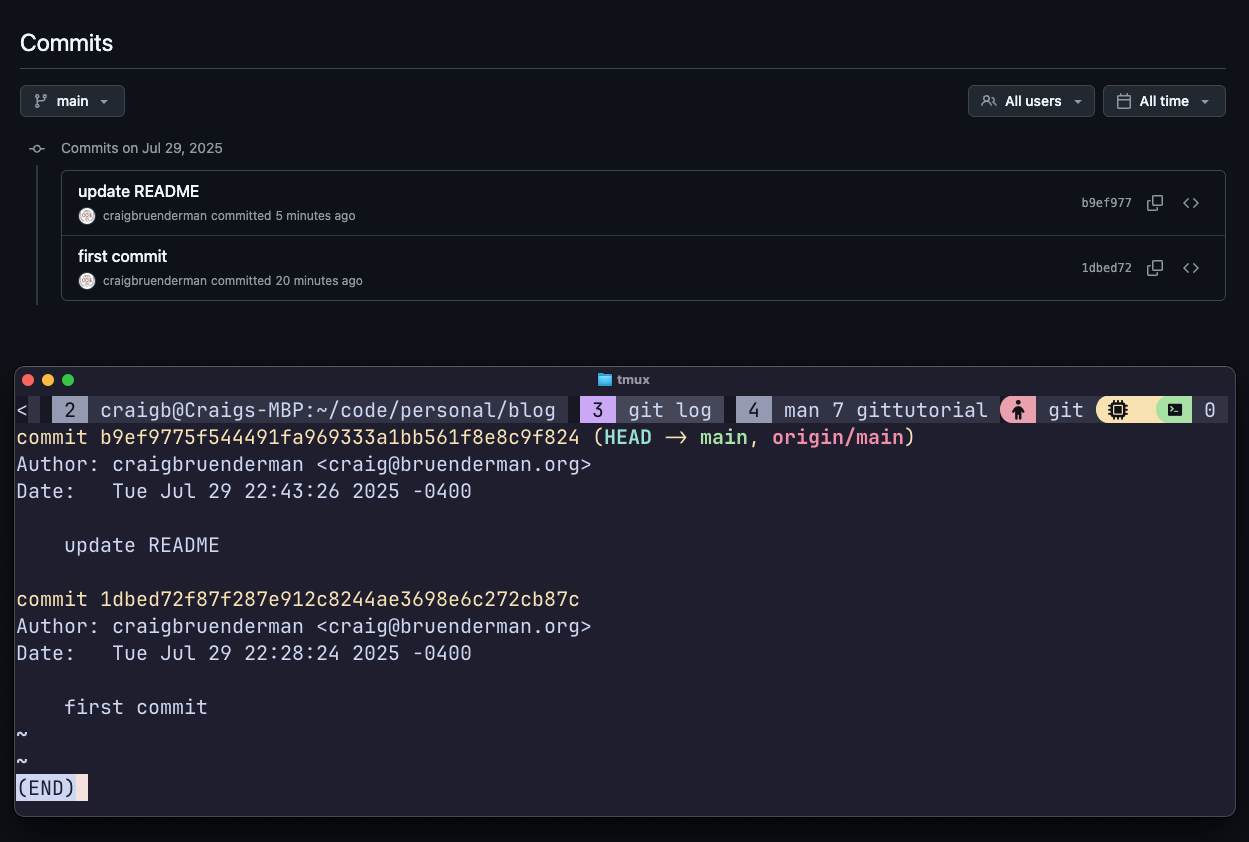
And just like that, the second commit was pushed and the updated README.md is now rendered with something more interesting.
Also notice that both the local and remote repos (overlaid) reflect the same commit IDs. They look different at first glance, but only because Github is truncating them to 7 characters.
So, now we’ve got a local repo which is connected to a remote Github repo via git remote add. We can make commits to the local repo, and then git push them to the remote Github repo. We can also git pull to sync any commits from the remote repo that are ahead of our local repo.
Origin#
The origin associated with a repo is a label used as a local identifier to refer to the remote repo.
Authentication#
Wait just a minute though… How was I able to just write to that Github remote repository using Git commands on my local machine? Didn’t I just say that this Github repo was viewable only, except by authenticated contributors? That is correct, I just skipped showing setting up auth to get a quick win. For auth, there are many options and this is not security advice, but I’ll cover using SSH keys to authenticate to Github. In your Github profile, enter Settings –> SSH and GPG keys. Add (or create and add) your public keys from the machines you’ll be using. I have one key for each machine I use with Github.
