
Git Branches#
Continuing on from the first post, branches are a key concept in Git and they can be thought of as an extension to commits. Just by virtue of creating the repo, I already have a branch which is the primary line of development. This default branch is typically called main or master, depending on your version of Git and is configurable in Git from version 2.28.0 onwards; mine is currently set to master.
Recall from Part 1 that I was working with a repo containing the single default branch, called master. As I added commits to master, they accumulated in order like so:
---
config:
  theme: 'base'
  gitGraph:
    mainBranchName: "master"
---
gitGraph
  commit
  commit
  commit
It turns out that Branches are nothing but organizational containers which contain commits. Assume we need our repo to diverge in some way from the main line of development so that we can make changes in a particular direction without affecting the primary line of development. Branches provide a sort of separate workspace where changes can be made without affecting the main line of development. That leaves the main branch in a state that it can continue to be used and deployed without worrying about what is going on in the other branches. Branches are commonly used to fix bugs or work on features, but they also commonly play a role in team based development. This is a bit hard to articulate clearly, but will become well understood as one works with Git.
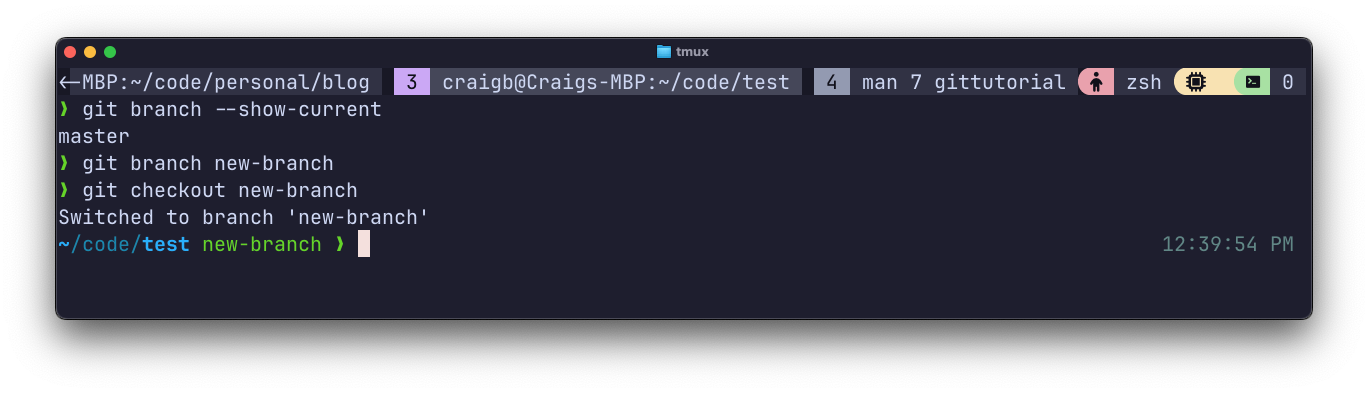
To demonstrate, I’ll create an additional branch to veer off into some other line of development. By running git branch <branch-name>, I create a new branch which uses the most recent commit to master as its starting point. Then git checkout new-branch checks out this newly created branch. This means that going forward, any actions on the repo will be directed into this organizational container of repo history, but not in master.
This diagram shows how a branching operation might proceed:
---
config:
  gitGraph:
    mainBranchName: "master"
---
gitGraph
  commit
  commit
  commit
  branch bugfix
  commit
  commit
  checkout master
  commit
  merge bugfix
The diagram indicates that after the 3rd commit in master, a new branch called bugfix was created. 2 commits were made in the bugfix branch to fix the bug, while 1 additional commit was made to master. Finally, the bugfix branch was merged back into master so that master could incorporate the changes made in the bugfix branch.
Within a repo, git branch will list all branches that exist in the repo.
Git Checkout#
In addition to creating and checking out a branch in separate steps, the two steps can be combined with git checkout -b <branch name>. So now we’ve seen that git checkout is used to switch between branches, but it can also be used to switch to a certain snapshot (commit).
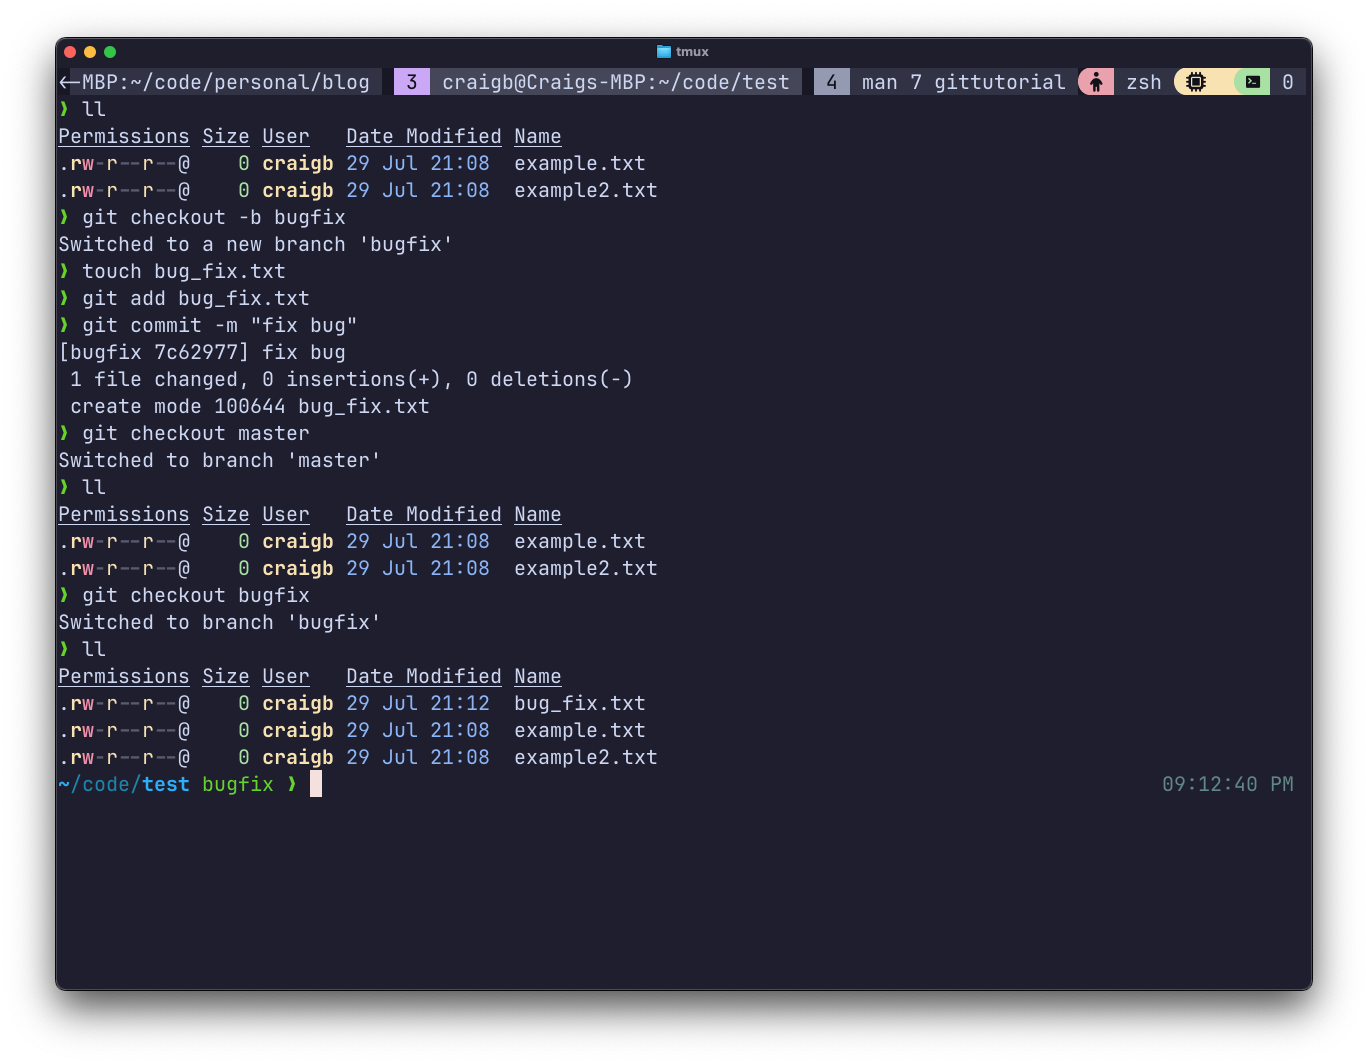
Notice the directory listing shows that the latest commit in the master branch includes 2 text files. Then I created a new branch, added and committed a file to it, so that bugfix has 3 files. Then, switching back to master, that commit still only has 2 files.
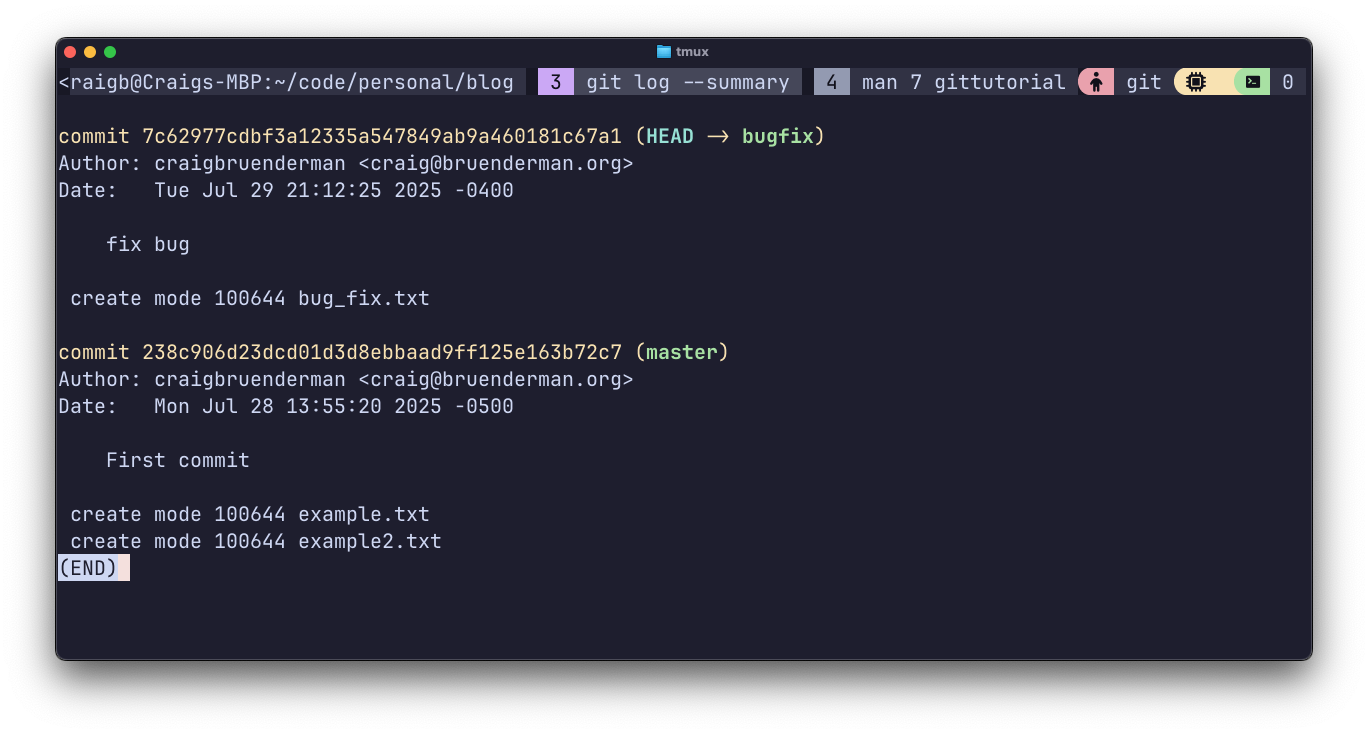
git log --summary indicates the file creation relative to each branch. The bugfix branch contains all 3 files, since it inherited 2 of the files when branched from master, and then got a third file of its own.
Merging#
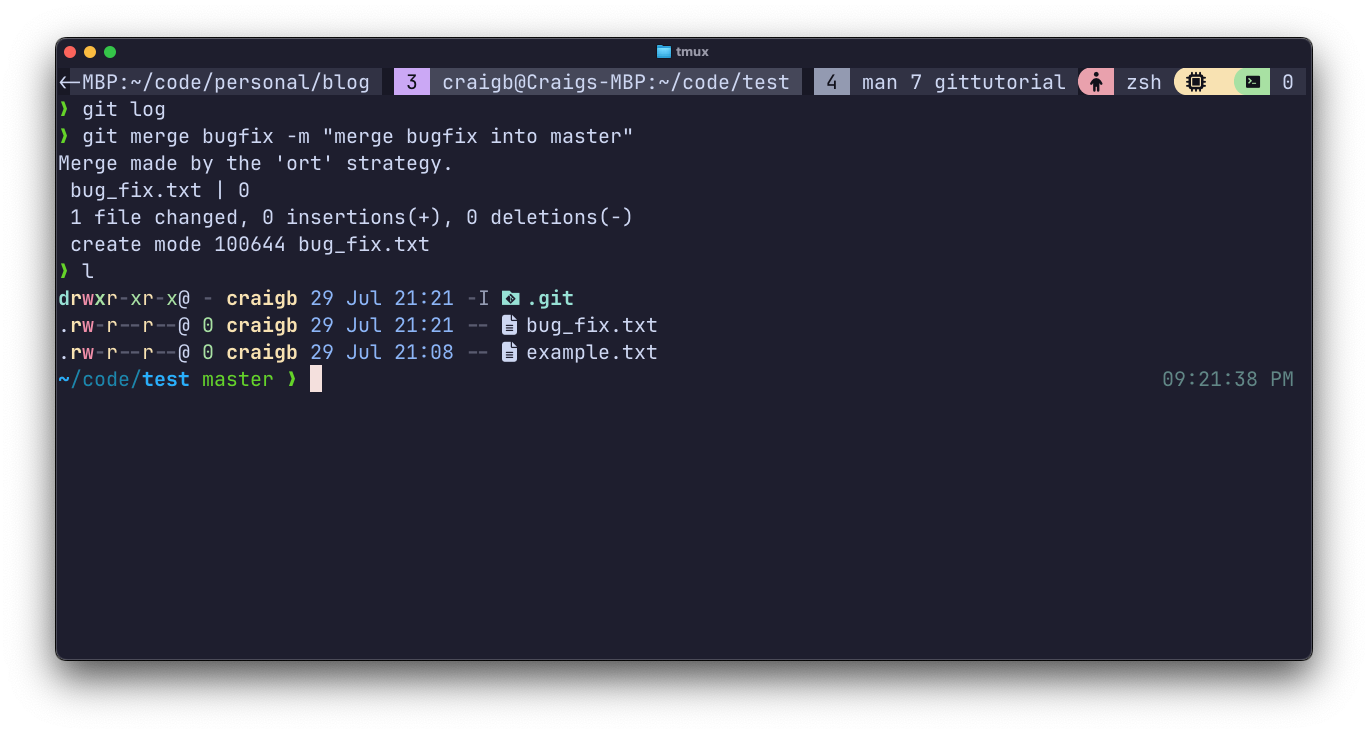
Merging in Git is pretty much what it sounds like - combining changes from one branch with another. It is the natural next step after branching. When a branch is ready to be merged back into the main development branch, issue git merge <branch to merge> from within the context of the branch you want to merge into (which is usually main/master).
Branches can be renamed with git branch -m <old> <new>. Once you have merged and are done with a branch, git branch -d <branch-name> will delete it. To delete a branch that has not been merged, git branch -D <branch-name>.
Merge Conflicts#
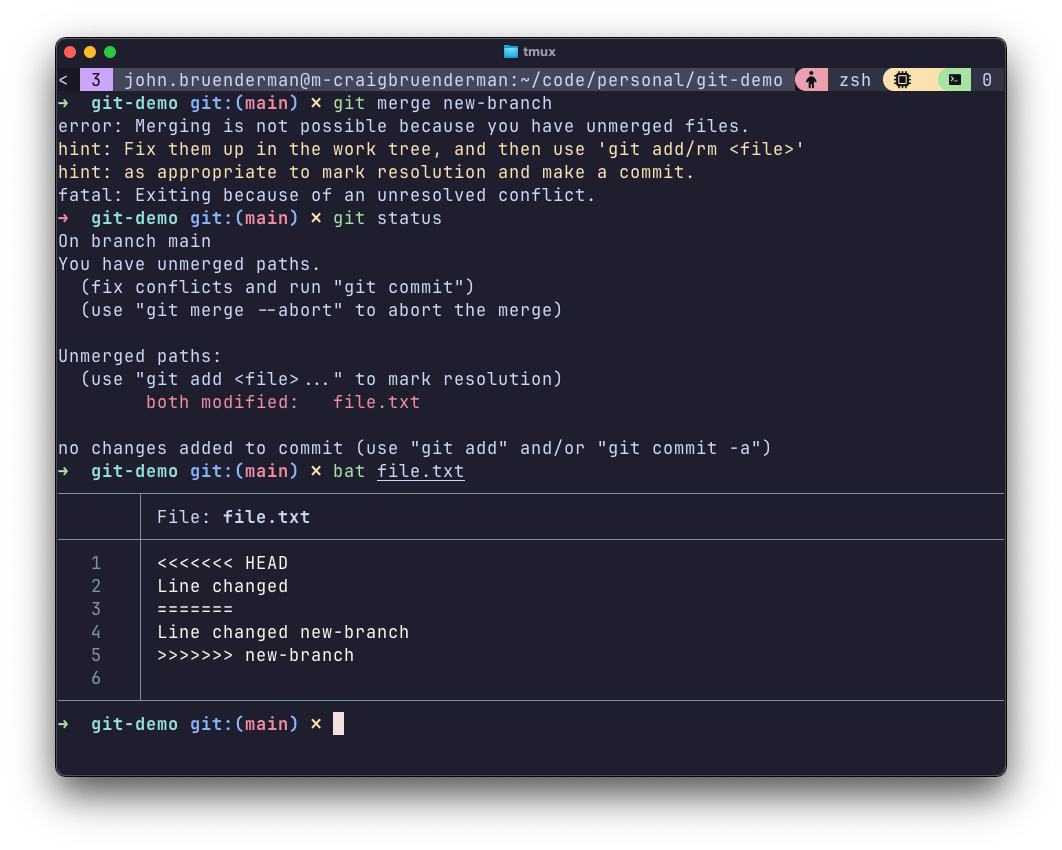
This is where things get tricky. Suppose you’re working in main, and create new-branch to test something. If you then make changes to the same part of a file(s) in both main and new-branch, and then attempt to merge new-branch back into main, you will encounter a merge conflict as Git sees conflicting changes and doesn’t know what was intended.
Below is an example where I purposely created a merge conflict. You can see markers in the file where Git indicates the merge conflict exists. Correct this manually and then merge again.
Summary of Commands#
| Command | Function |
|---|---|
git init | One time initialization of a repo |
git add <file(s)> | Stage changes for the next commit |
git commit -m "comment" | Create a commit for staged changes with a comment |
git status | Get current repo, including status of staged changes |
git log | Print ordered list of commits |
git checkout <id> | Temporarily move back to commit |
git revert <id> | Revert the changes of commit |
git reset <id> | Undo commit(s) up to commit |
Conclusion#
That wraps up a very short primer for Git. I’ve skipped a lot, so head to that book for much better coverage. This post was mainly helpful for me to dust off some Git cobwebs and play with some features of Hugo+Blowfish.