
Series Overview#
In this series, I’ll be looking at the Git version control system. There is quite a bit to Git and its related tooling, but hang in there because it’s an essential tool in many aspects of IT and software in general. In fact, this very blog post you’re reading right now is brought to you by a relatively simple use of Git, Github, and Github Actions along with the Hugo static website generator and a theme called Blowfish. I’ll cover the workflow later as an example of how Git, Github, and Github Actions fit together.
Git Overview#
Git is a popular tool for distributed version control that was built by Linus Torvalds over 20 years ago to manage the large distributed development cycle for the Linux kernel. Git can be used to maintain a file repository for a single user on a single local machine, or by many collaborators working on multiple versions of multiple projects with mechanisms to synchronize the development work. Version control is a critical tool to facilitate software development workflow and lifecycle, especially when there are multiple contributors.
In software development, distributed version control (also known as distributed revision control) is a form of version control in which the complete codebase, including its full history, is mirrored on every developer’s computer.[1] Compared to centralized version control, this enables automatic management branching and merging, speeds up most operations (except pushing and fetching), improves the ability to work offline, and does not rely on a single location for backups.[1][2][3] Git, the world’s most popular version control system,[4] is a distributed version control system.
In 2010, software development author Joel Spolsky described distributed version control systems as “possibly the biggest advance in software development technology in the [past] ten years”.
This section of the Pro Git book gives a nice summary of what version control is all about.
What is “version control”, and why should you care? Version control is a system that records changes to a file or set of files over time so that you can recall specific versions later. For the examples in this book, you will use software source code as the files being version controlled, though in reality you can do this with nearly any type of file on a computer.
If you are a graphic or web designer and want to keep every version of an image or layout (which you would most certainly want to), a Version Control System (VCS) is a very wise thing to use. It allows you to revert selected files back to a previous state, revert the entire project back to a previous state, compare changes over time, see who last modified something that might be causing a problem, who introduced an issue and when, and more. Using a VCS also generally means that if you screw things up or lose files, you can easily recover. In addition, you get all this for very little overhead.
So as we see, version control is useful for many types of software development including static web sites, complex dynamic web applications, commercially available binary packages, and the Linux kernel. In fact, it doesn’t have to be software at all and could be any set of binary and/or text files that need to be version controlled.
Git Fundamentals#
It’s great that thousands of professional software devlopers use Git to build and maintain the Linux kernel’s 40MM+ lines of code, but let’s discuss this in practical terms for simple projects and novices like myself. My first example will entail using the open-source Git command-line tool to create and interact with a Git Repository which stores all the files for this blog. Here come the fundamentals.
Git Setup#
I’ll assume you can get Git installed from these instructions. At that point, you’ll have a set of CLI commands available to interact with Git. You will then want to perform some initial configuration, which typically sets what you want to display as your username for activity attributed to you in Git.
git config --global user.name "your-username"
git config --global user.email "your-email"Repositories#
Git repositories are the containers for individual projects that are version controlled by Git. We’ll start with a local Git repository, which is simply a folder on your machine that has been initialized with the git init command run within it. To create a local Git repo, either create a new folder or change to an existing one where you want the repository to live.
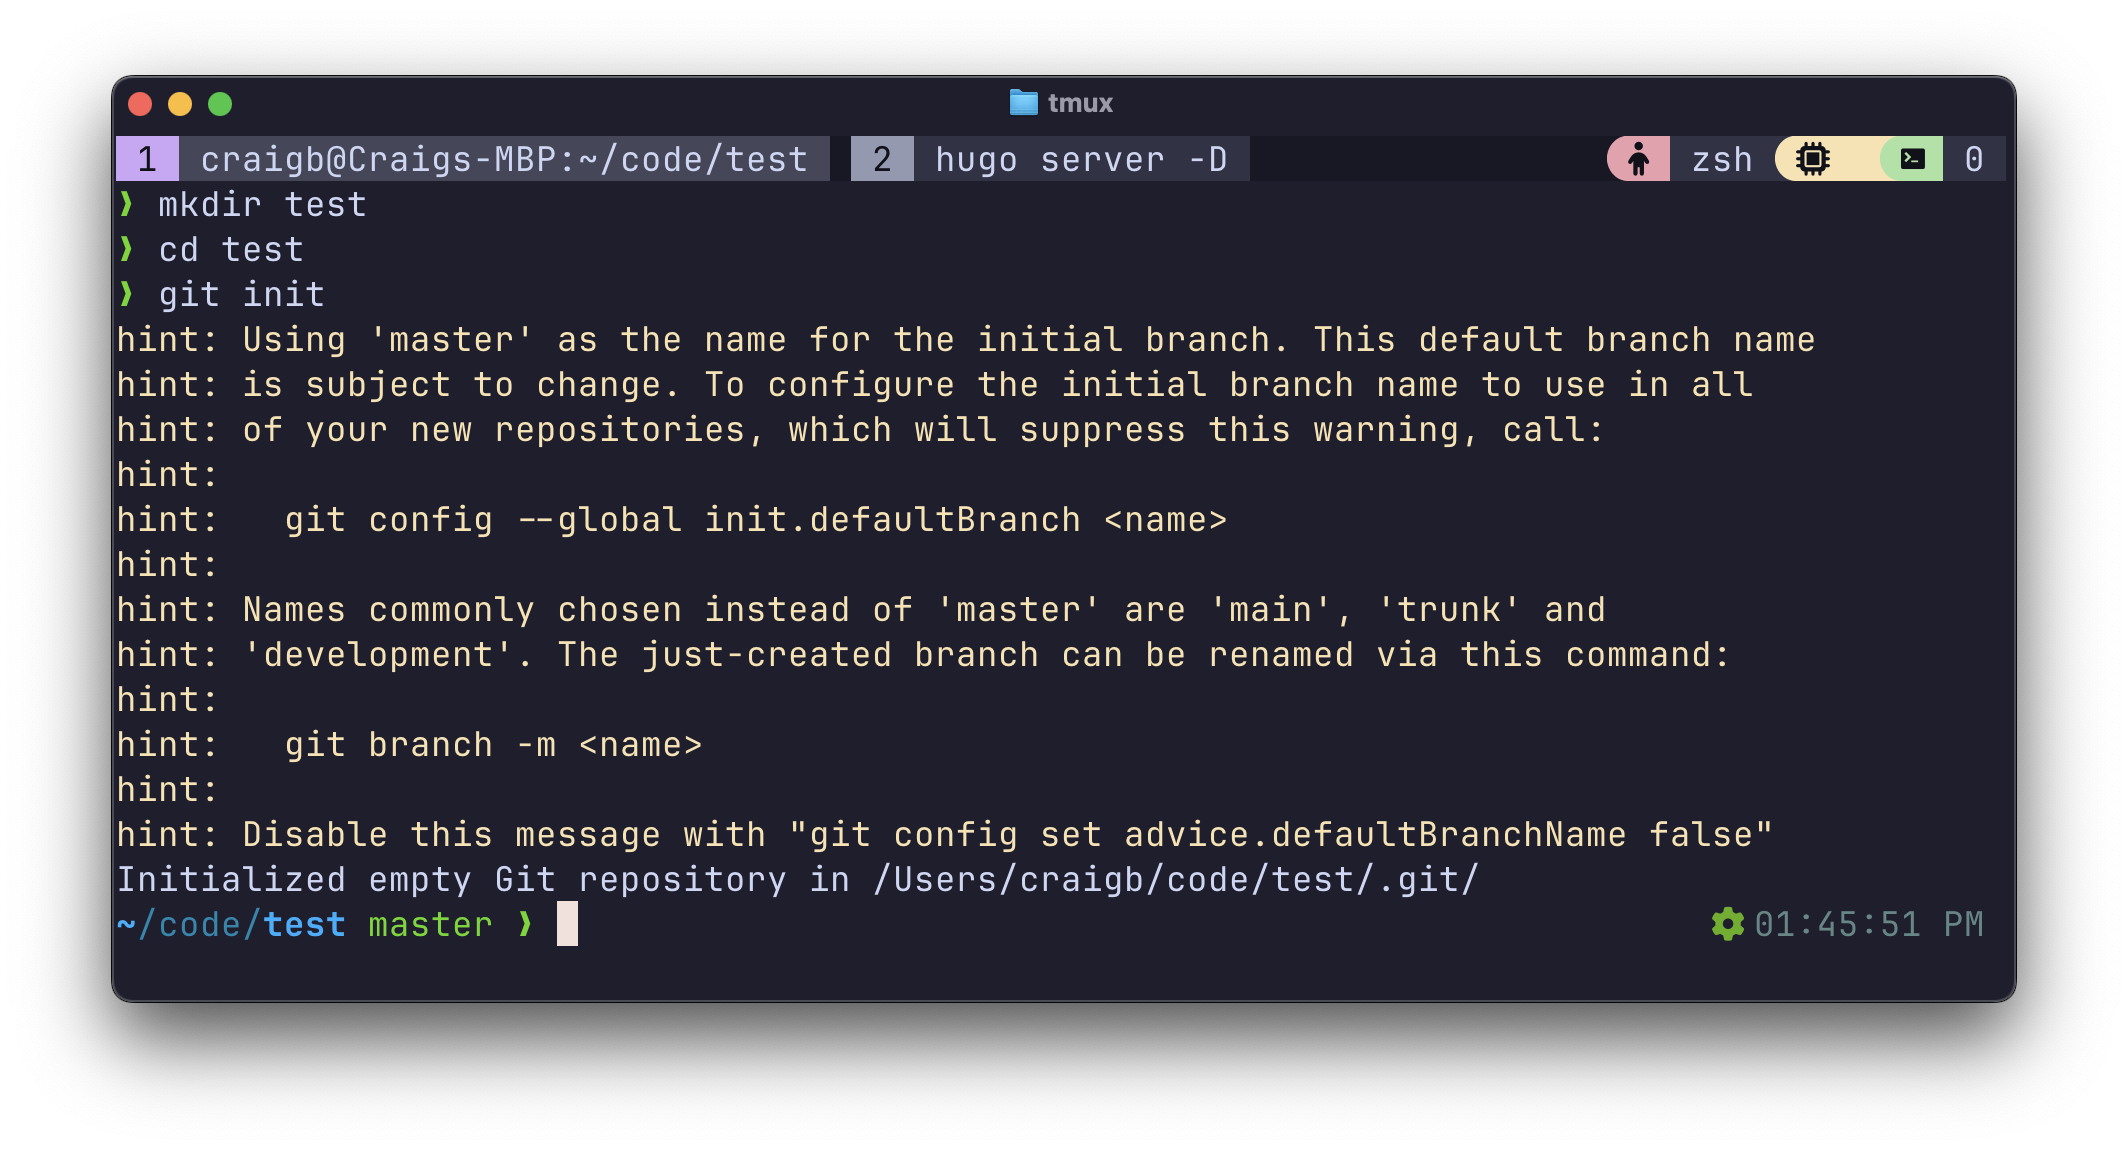
Note that my prompt shows the file path of the repo, along with the green text master. This indicates which branch of the repo I’m in and will be discussed more.
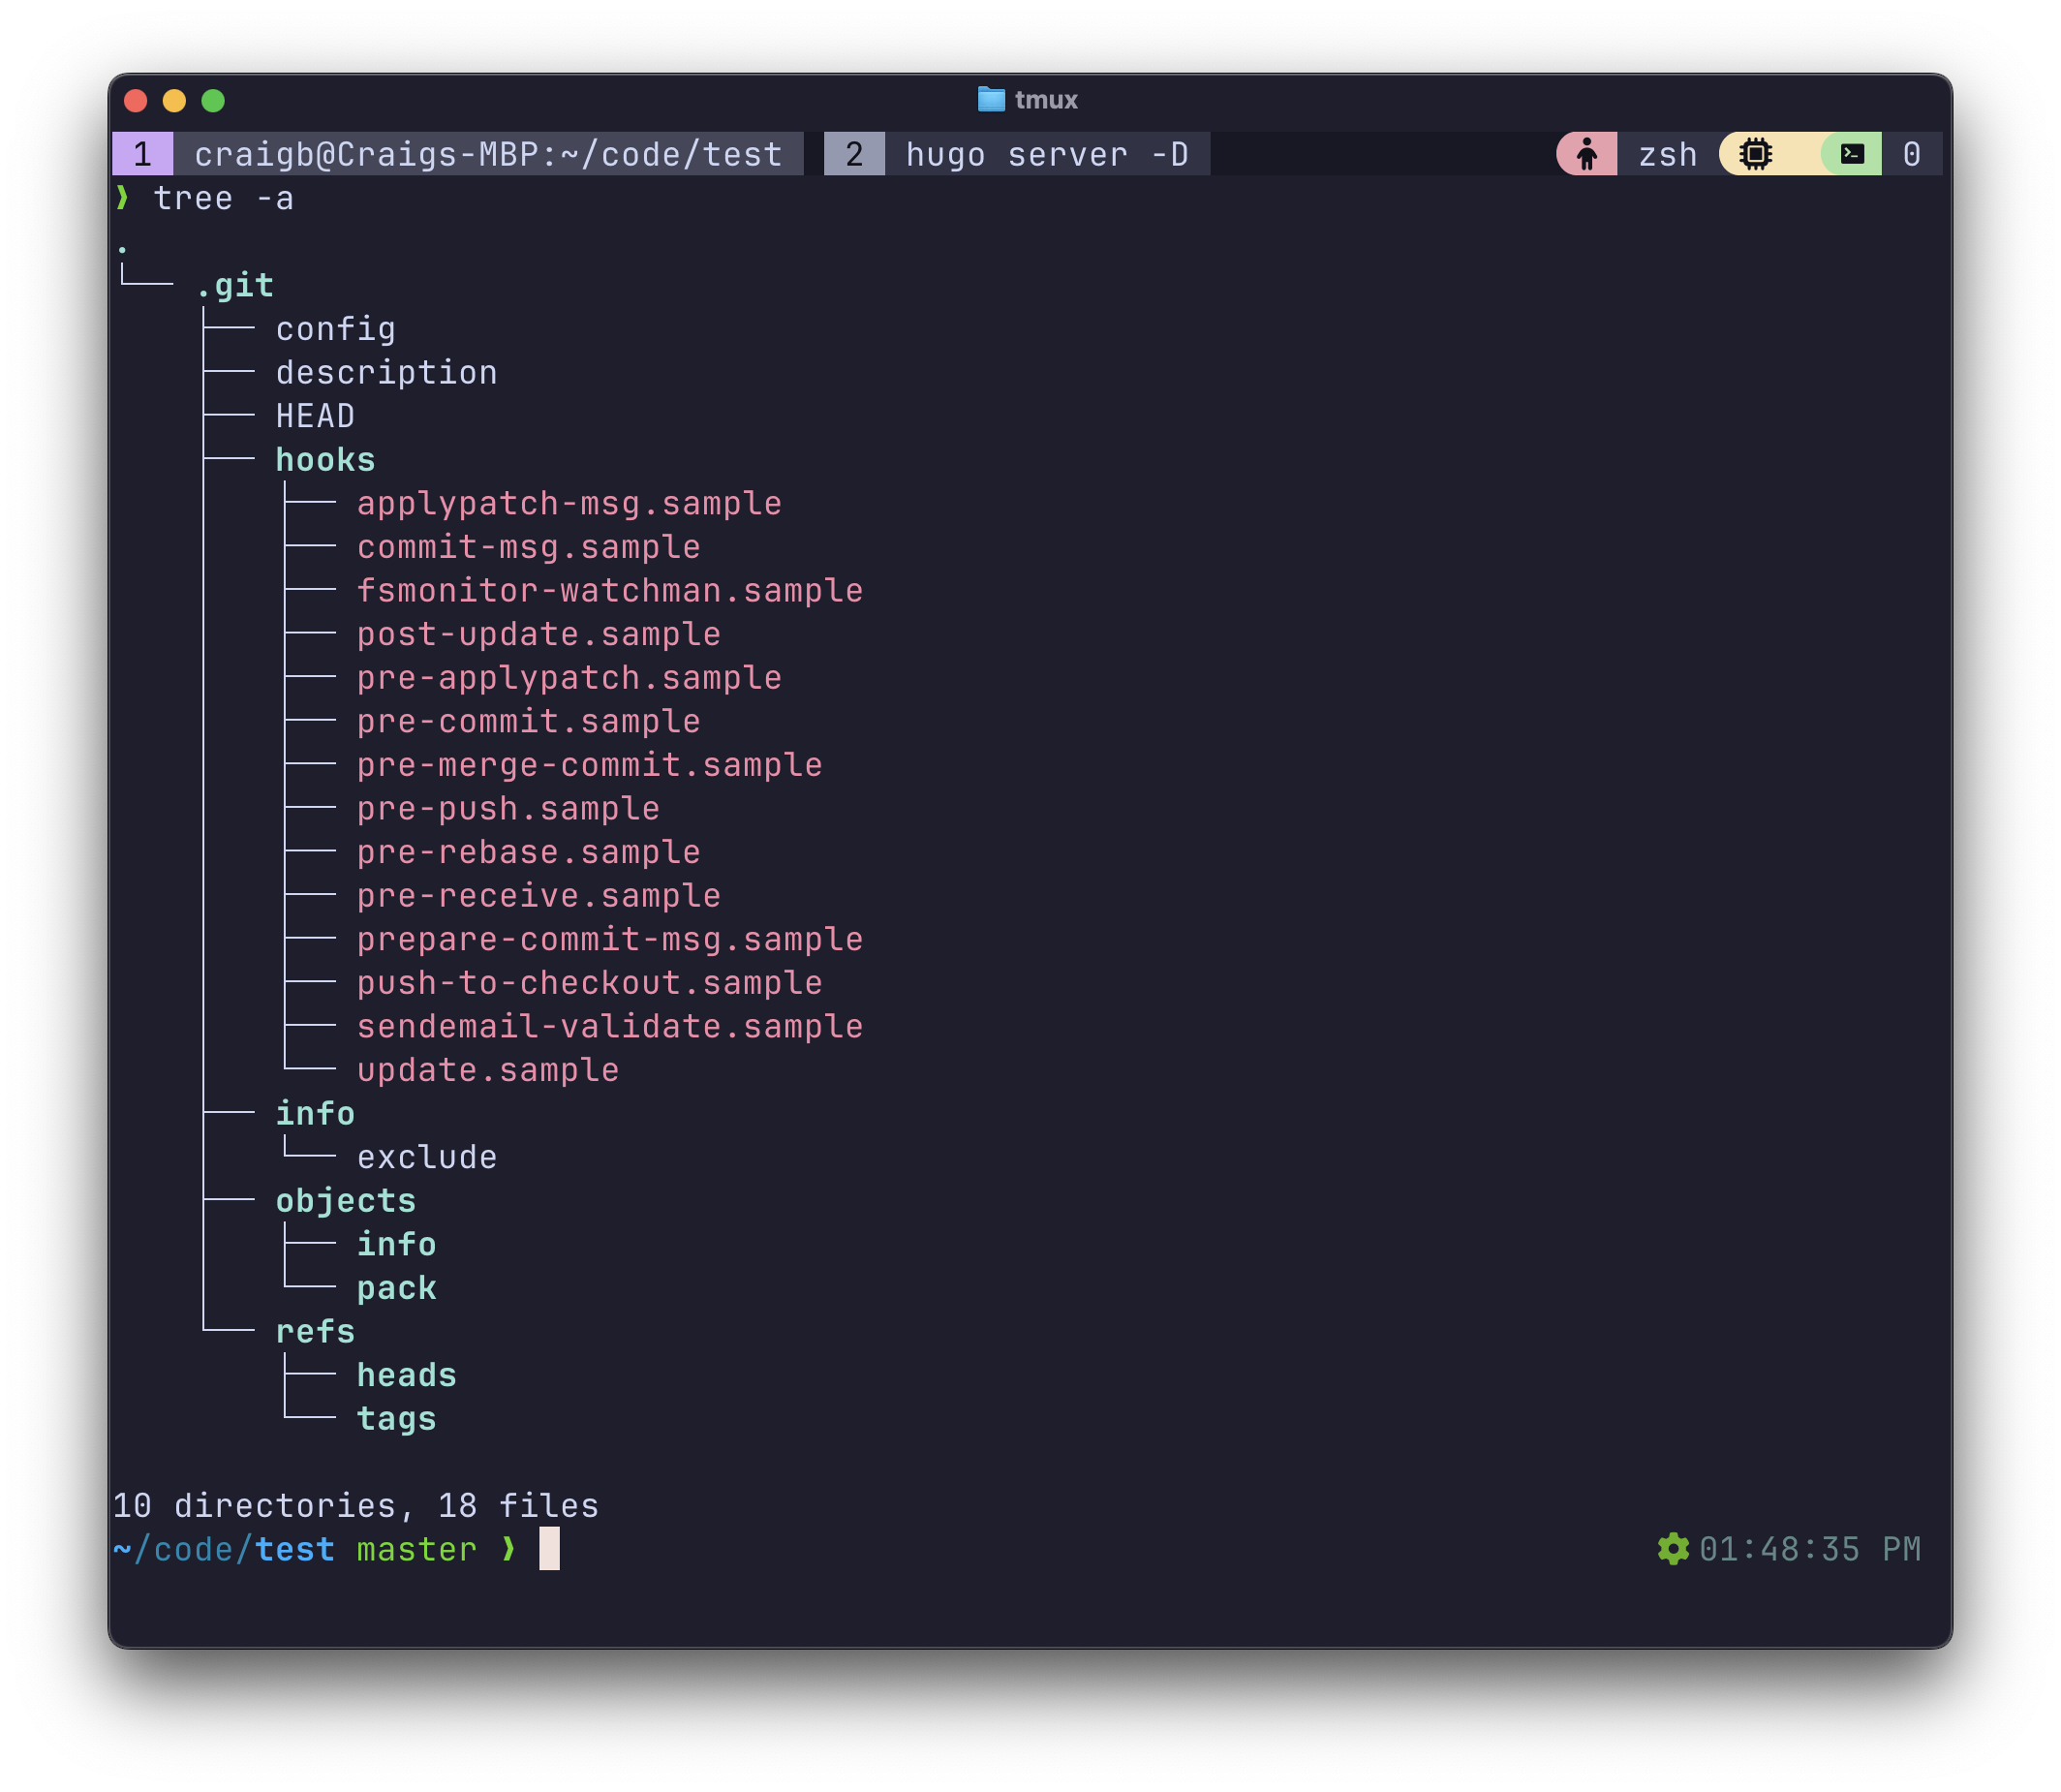
Easy enough, we can see that it created a hidden .git directory with a handful of files and sub-directories. This is how an empty Git repo initially begins, and there is currently nothing that for it to keep track of.
Git Staging#
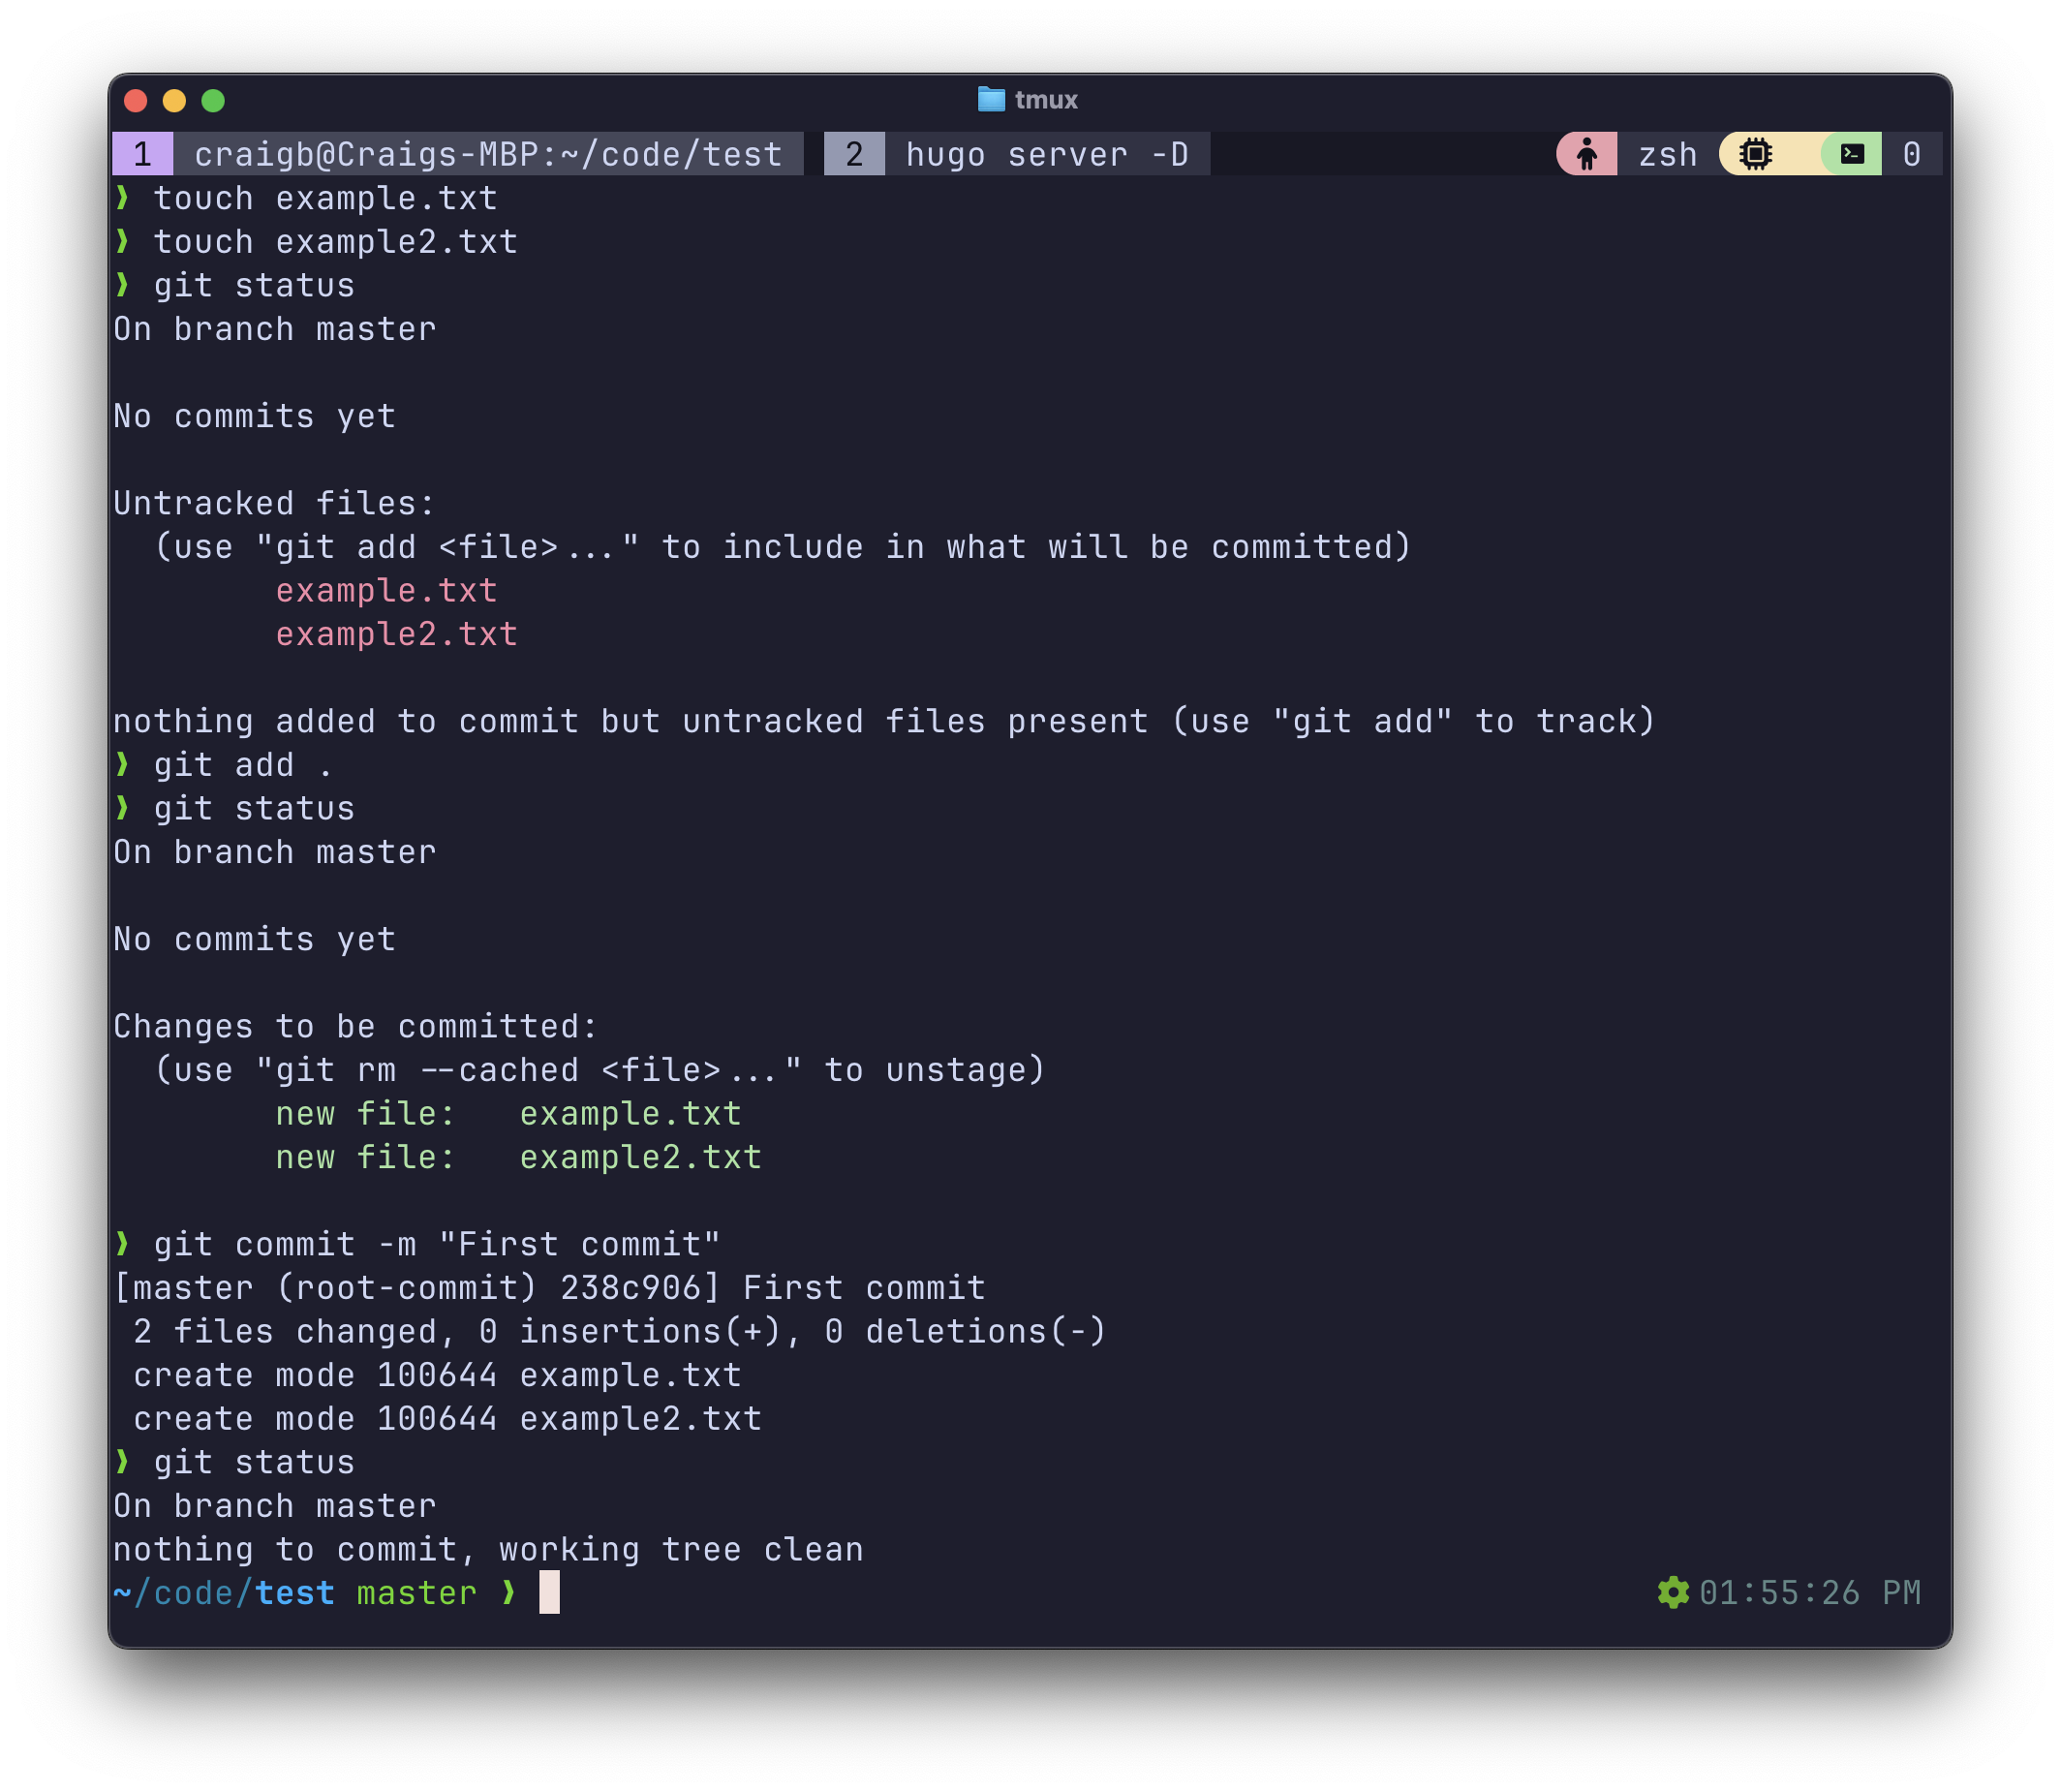
Commits are discrete point in time snapshots of a repository as it changes. To create commits, we first create or move files into the repo and tell Git to start keeping track of them. You can see I used touch to create example.txt and example2.txt, and then ran git status. Git replies that it sees those files present in the repo directory, but it is not tracking them yet. After git add ., those files are now being tracked in a Staging area which Git calls the index, so that they are marked to be acted upon in the next Commit.
To unstage a file that has been added to the staging area but not yet committed use git restore --staged <filename>.
Git Commit#
Next I use git commit -m "Commit comment here to actually affect the commit, and this snapshot of changes has been recorded in Git. If you issue only git commit without the comment argument, Git will open your editor and ask you to input the commit comment right there. Then I made a change to example2.txt, ran git status to see that Git noticed it has changed, staged it with git add, and made my second commit to this repo. It might not initially make sense that one must add files to Git repeatedly, so think of git add as adding a certain file in a certain state, and know that any time you want to record the changed state, you must git add the file again.
As commits accumulate in the default main/master branch, they accumulate like so:
---
config:
  theme: 'base'
  gitGraph:
    mainBranchName: "master"
---
gitGraph
  commit
  commit
  commit
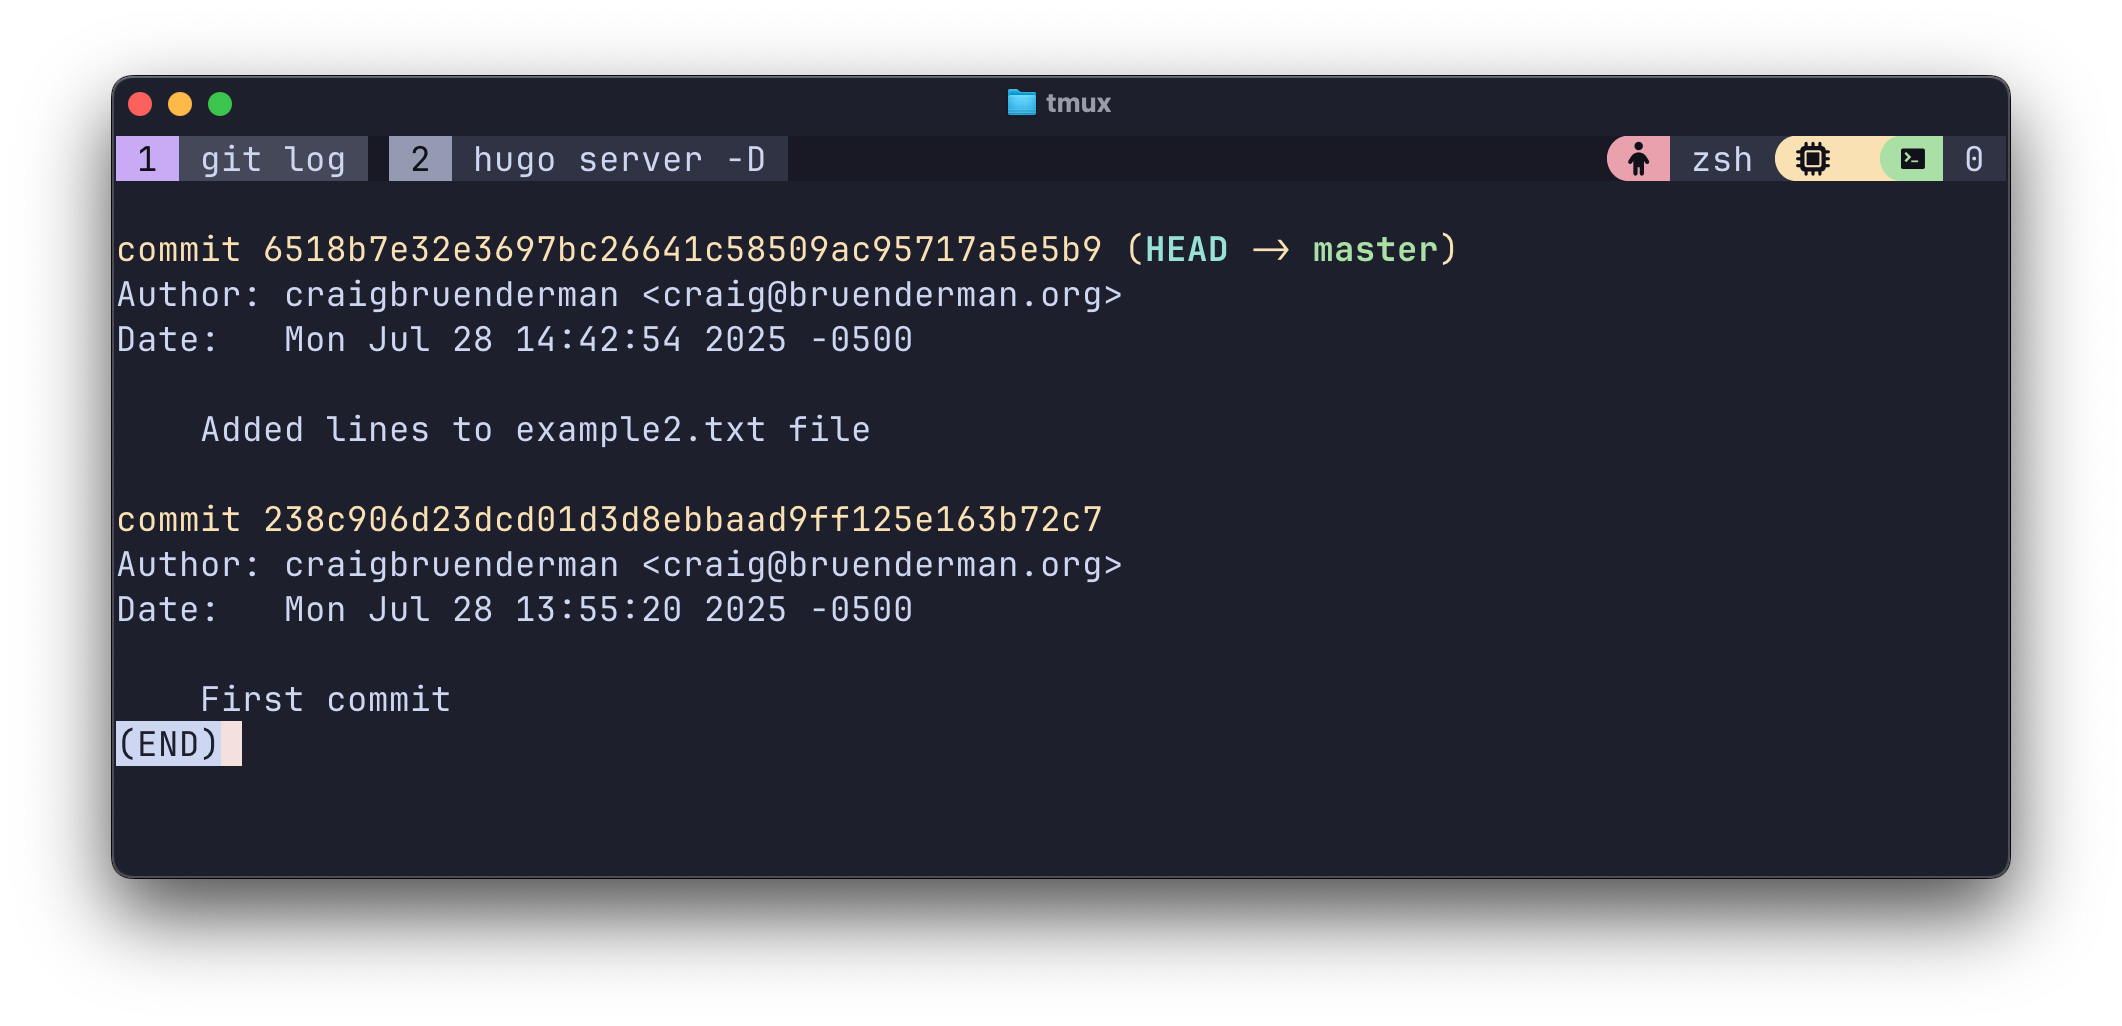
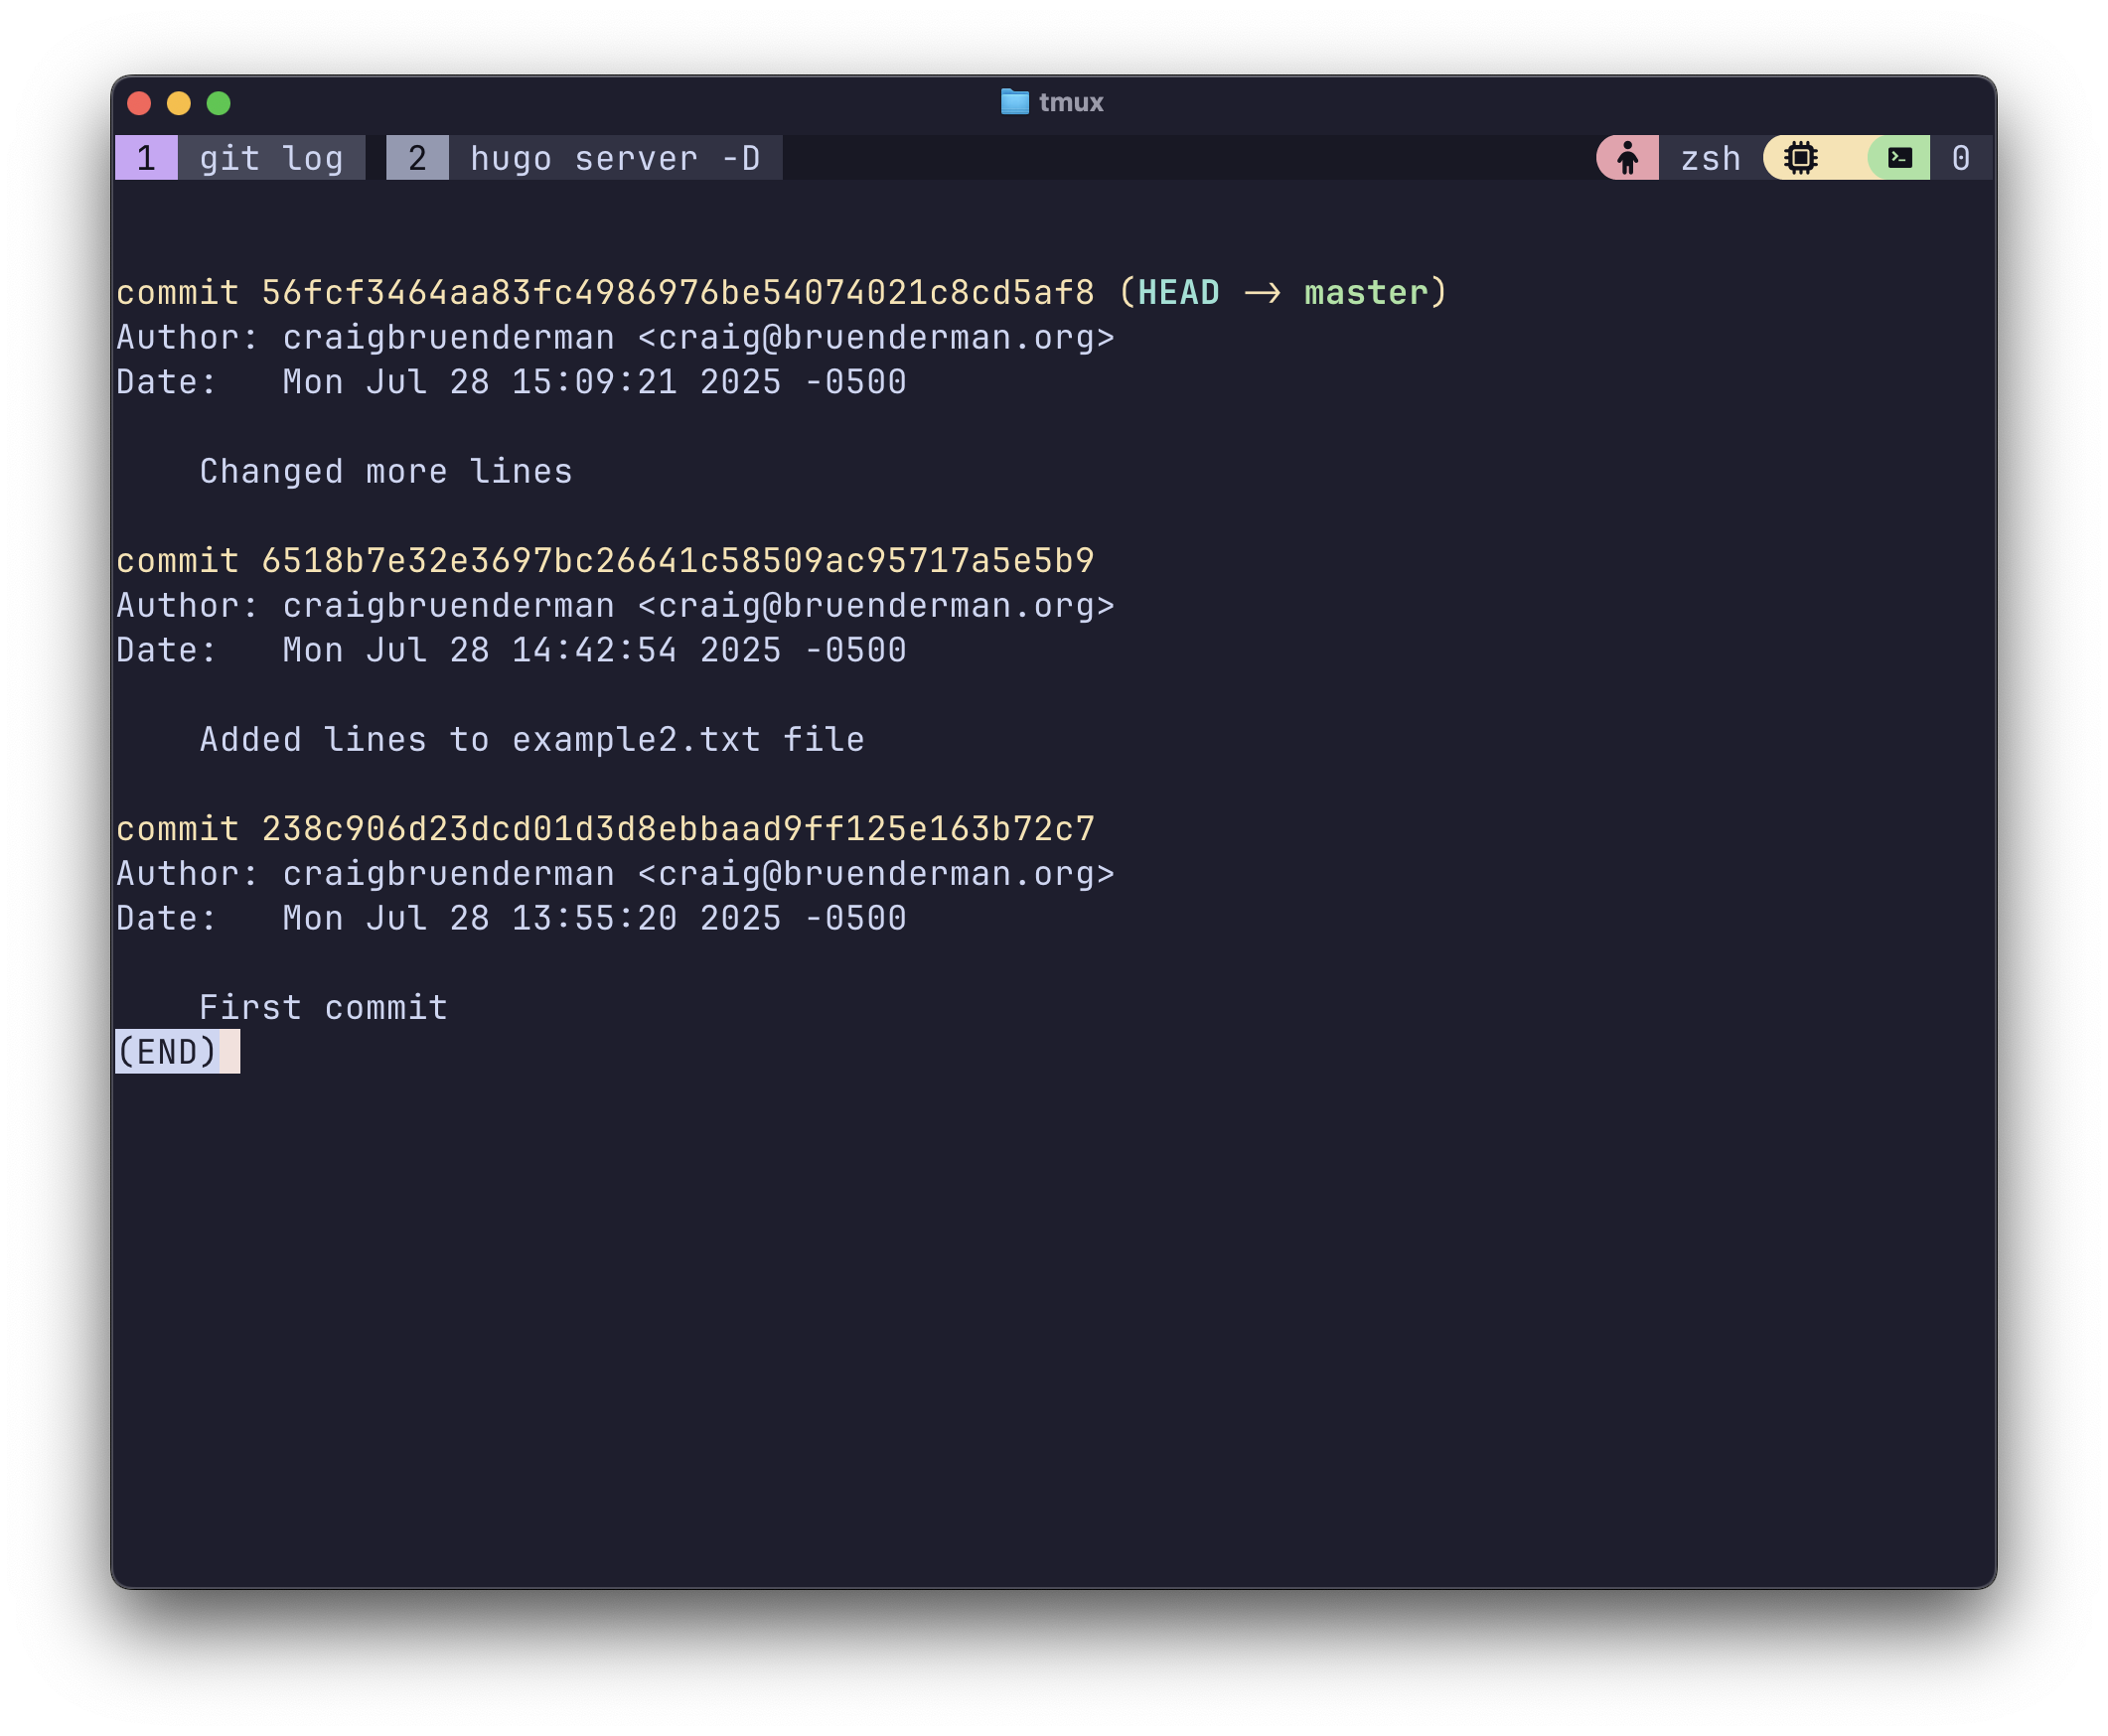
git log now shows me the history of commits I’ve made, and you can now see why we set username and email address in Git’s config, so that it can be recorded in the commit history. Notice the yellow string after the word commit. This indicates a unique identifier for each exact point in time snapshot of the repo corresponding to each commit and these strings end up being used to navigate between commits as you work within a repo.
There is an alternative workflow to the above for making changes to only existing Git tracked files. git commit -a -m "comment" will notice any modified (but not new) files, add them to the index, and commit, all in one step.
git log can be used to show varying degress of detail about the changes made to the repo. Try git log --stat --summary and git log -p to see some examples.
HEAD Pointer#
The concept of the HEAD pointer is important to understanding the state of repos. HEAD moves around depending on what commit (snapshot) of the code base we’ve asked Git to work with. In the screenshots above, notice HEAD –> master. master is the name of the default branch of our repo. We haven’t discussed branches yet, so right now this just tells us our local repo is working with the most recent commit of the two possible commits we made, in the only branch we have.
HEAD answers the question: Where am I right now in the repository? It is a pointer to the currently checked-out branch or commit, which contains an immutable snapshot of your entire code base at a given time. Whichever commit HEAD is referencing directly (using the hash) or by reference (using a branch), it’ll always be the commit on which any local changes are based.
Simple Workflow#
You’ll routinely work with 3 areas of Git:
- Working Directory: The directory where files live and are edited
- Staging Area (Index): Where files go in preparation for changes to be committed
- Repository: Where committed history is stored
graph LR;
A[git init]-->B[Development Work]-->C[git add .]-->D[git commit -m]-->B;
Git Diff#
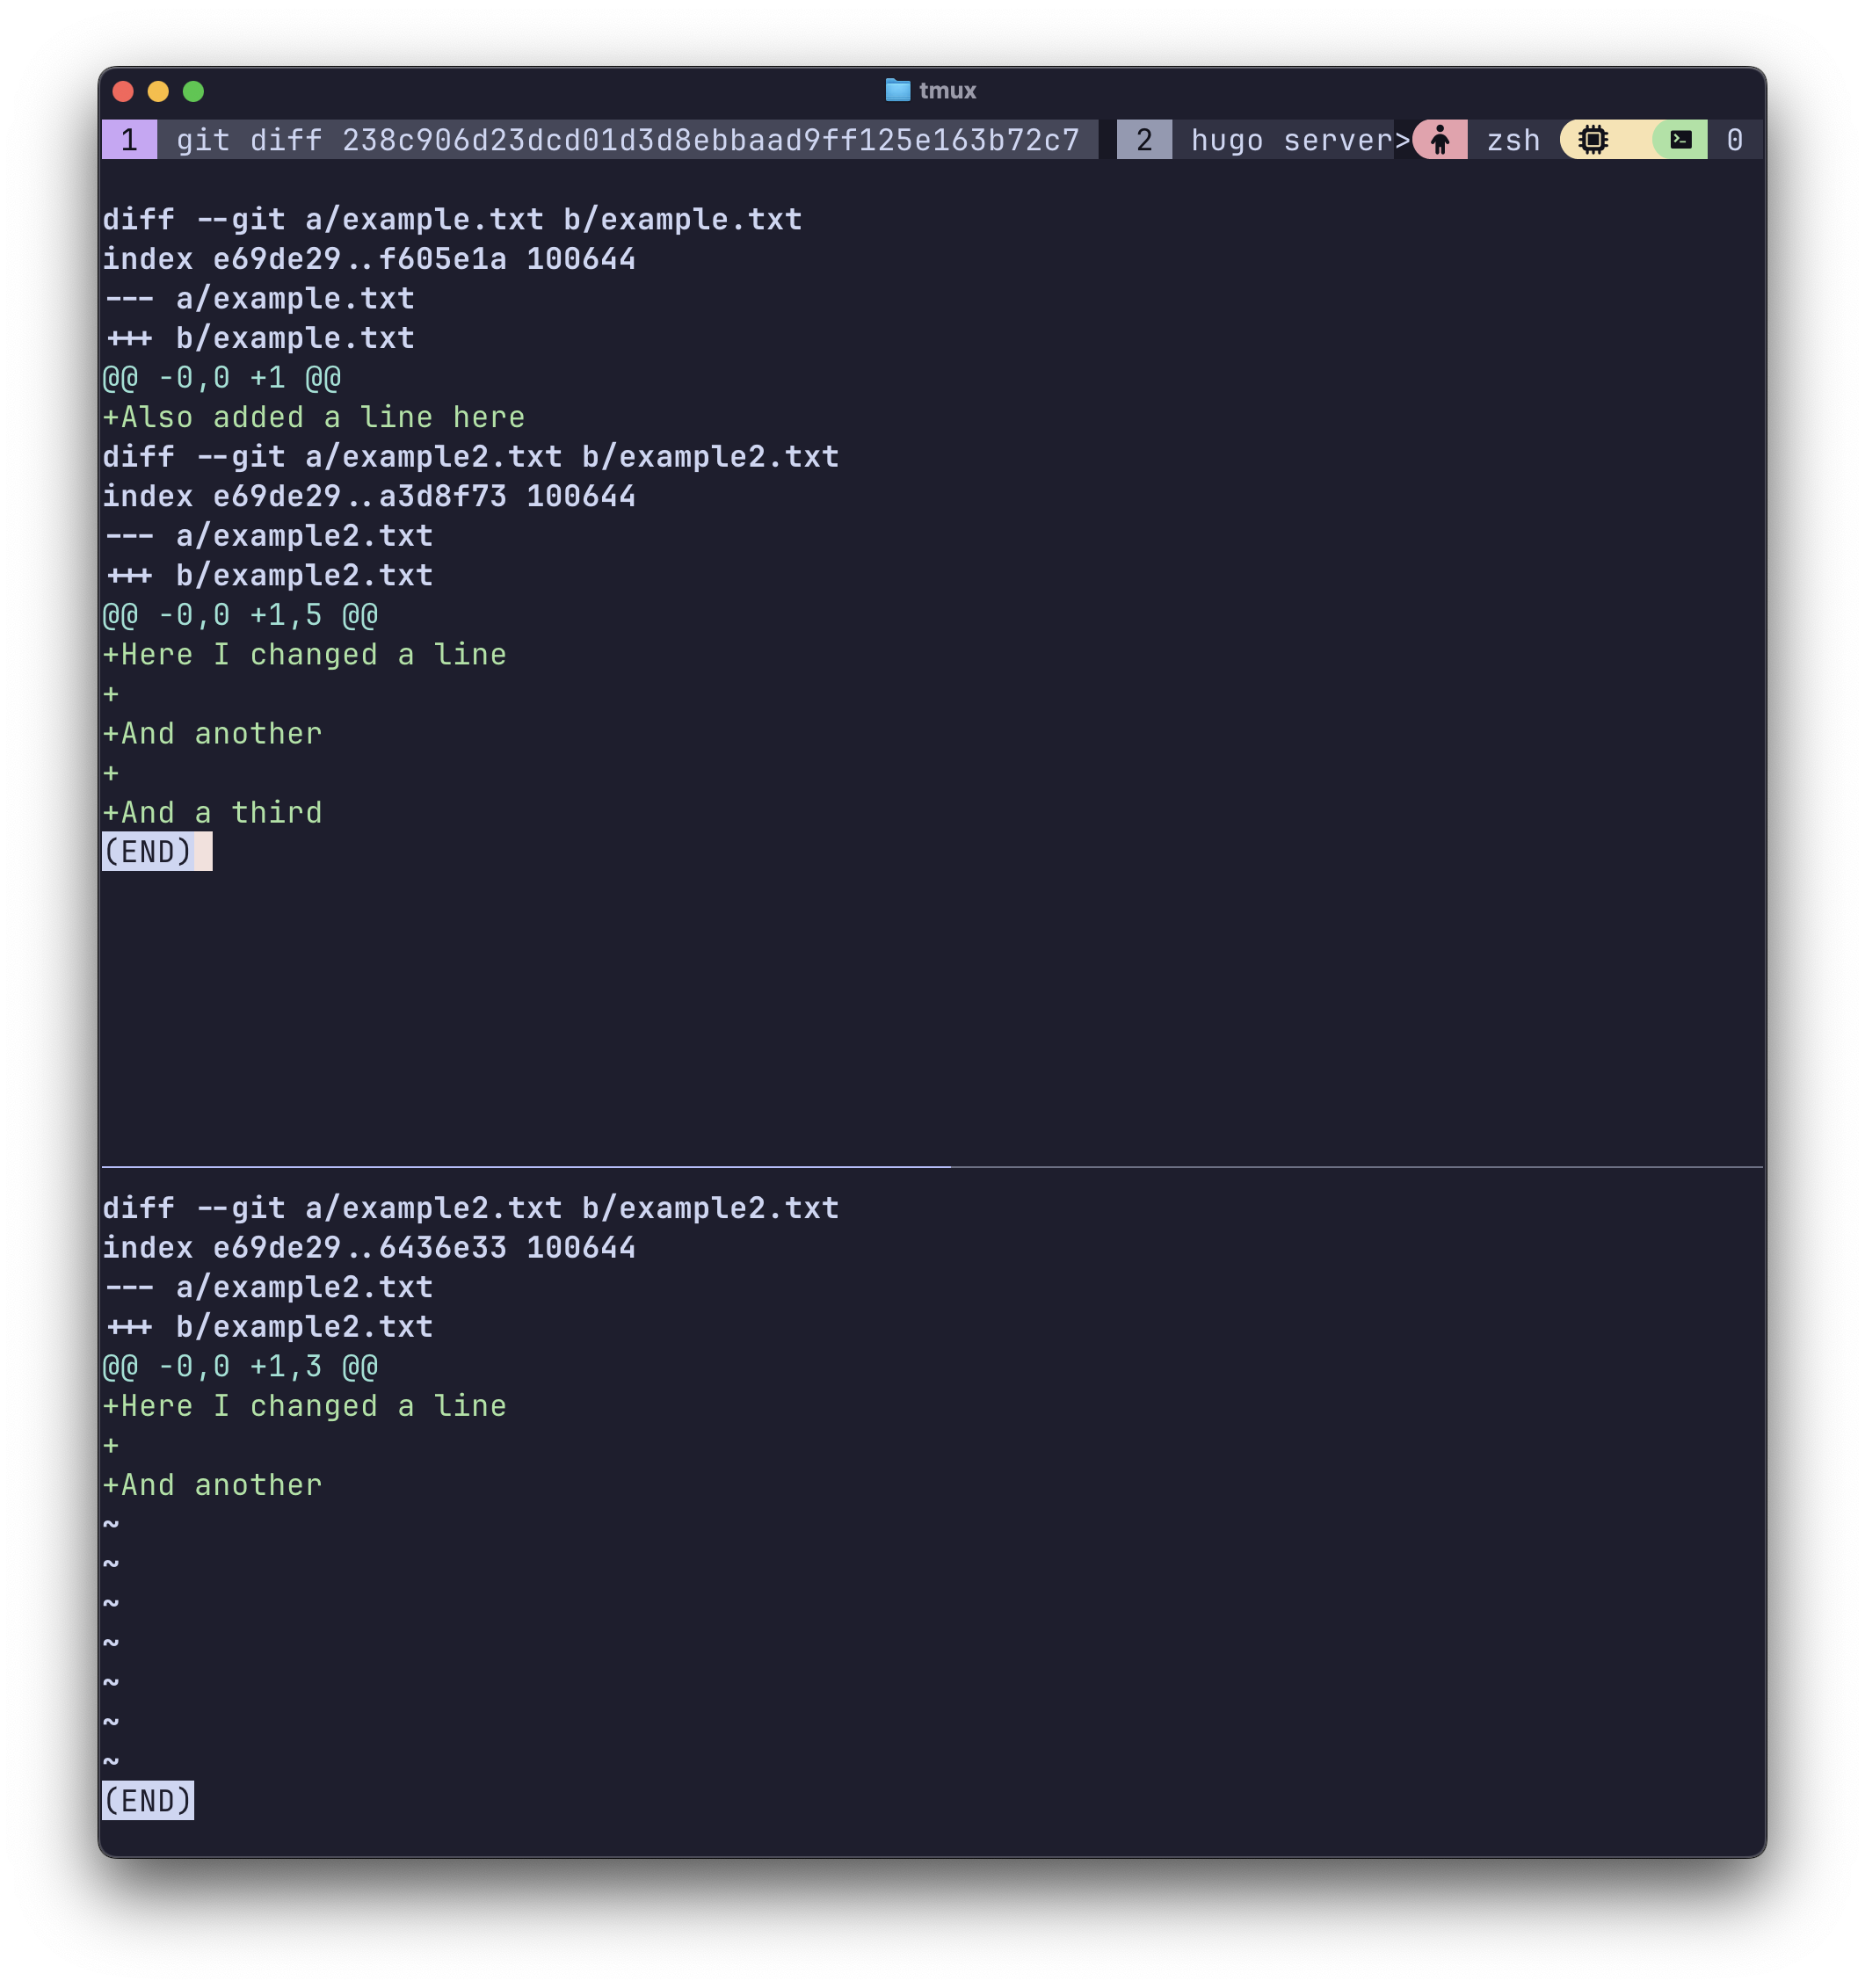
We can use commit strings to look at the state of the repo between two commits. Below git log shows I’ve now made 3 commits, and I run some git diff’s between them. The screenshot first shows all the changes from my first commit when the text files were empty, and then the changes between the first and second commits.
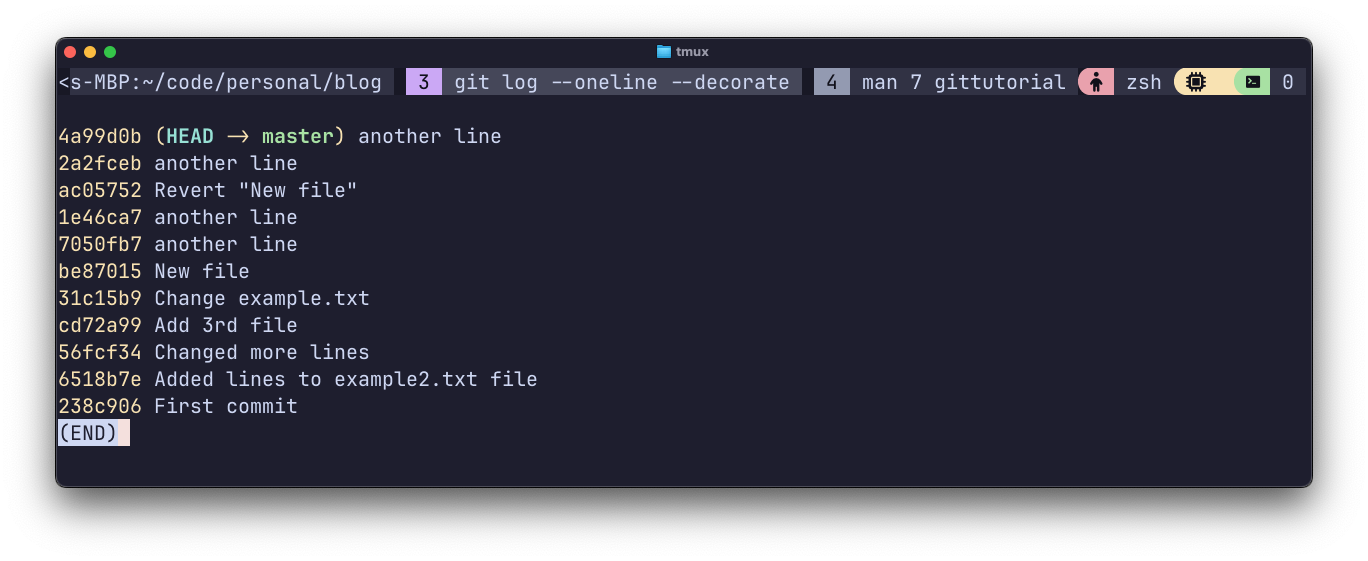
Git Revert#
When you need to undo the changes made in a particular commit, git revert <commit id> is used. This will look at the commit of the given id, and revert just the changes made by that commit. Git will actually create a new commit to affect this change, so the whole lifecycle of the repo continues to be tracked accurately. This fact also makes the git revert itself reversible since its action is a commit of its own.
Git Reset#
When you need to remove all changes made since a particular commit, use git reset --hard <id>. This is a destructive command in Git, which erases history, so be sure you want this before issuing it because there is no reversing it.
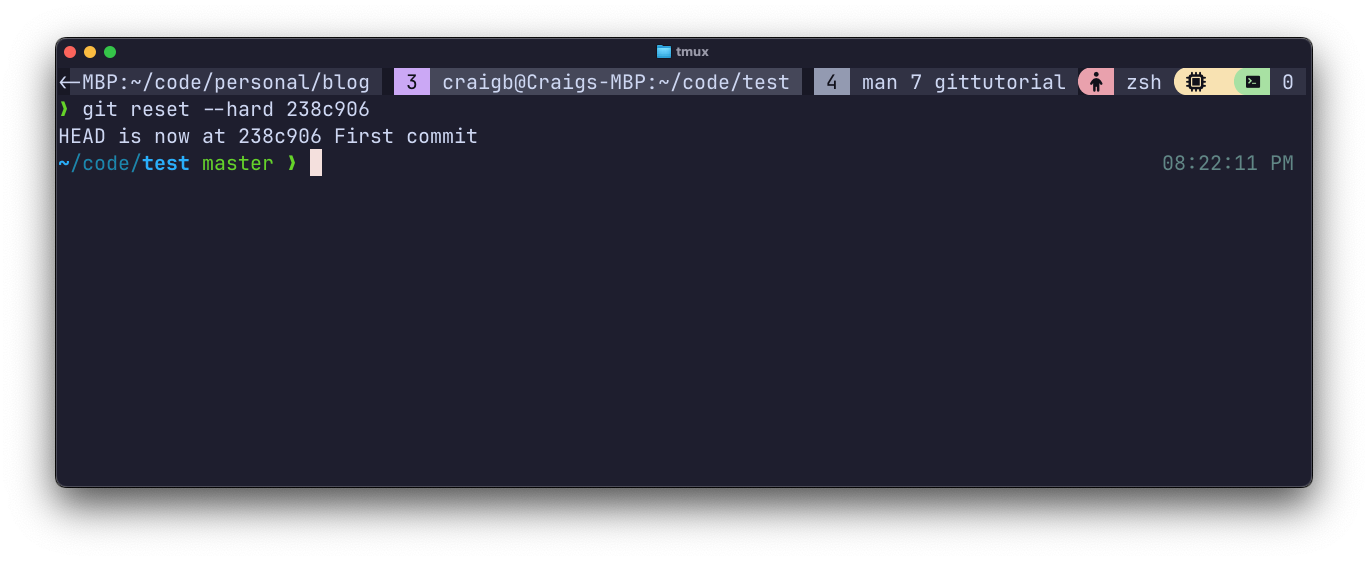
You can see I’ve used git reset to delete all commits back to the first one.
.gitignore#
Frequently it’s required to exclude certain locally stored files and directories from the Git repo itself. These could be the infamous .DS_Store files in MacOS, settings and variable specific to your own system, and especially sensitive credentials. A common security vulnerability these days is leaking of API tokens which have been stored along with the code that uses them, and it can be a real disaster if those keys are for something like a high permission AWS/Azure account. A fun side-quest is to use Canary Tokens to generate honeypot credentials, put them somewhere publicly accessible, and see how long it takes for them to be stolen.
You can add a file called .gitignore to any Git repo, and include text entries of file and directory patterns that should be ignored so they are not tracked by Git. The syntax is all here.
# Sample .gitignore file

.DS_Store   # Mac files
temp/       # Anything in a directory called temp
*.log       # Files with .log extension
You may also want to setup a global .gitignore that applies to all projects. This can be done by creating something like ~/.gitignore_global and configuring Git to use it via git config --global core.excludesfile ~/.gitignore_global.