
Background#
Containerlab is a great tool for labbing network infrastructure. It’s lightweigth enough to run meaningful topologies on modest hardware. I can easily run a 12-node Arista EVPN VXLAN fabric on a machine from 2018 with 32GB of RAM. It is functionally similar to GNS3 or EVE-ng, but uses Docker containers to support many node types. I used it to do my all my lab prep for the Arista ACE:L3 certification, which is great since I have no Arista lab gear at the moment.
Installation#
Containerlab installation is straight-forward on Linux-based systems. The host I’ll be running Containerlab on is a Lenovo laptop running Linux Mint, and I was able to isntall it directly using apt. I am aware there are options for running Containerlab on MacOS directly, but I’m too lazy to try right now.
Node types#
Nodes are supported in one of two methods. Some node types, such as Arista EOS are available as both. In this case, I prefer the native container version since it’s lighter weight.
- Native container
- Virtual machine packaged into a container
Native Container Nodes#
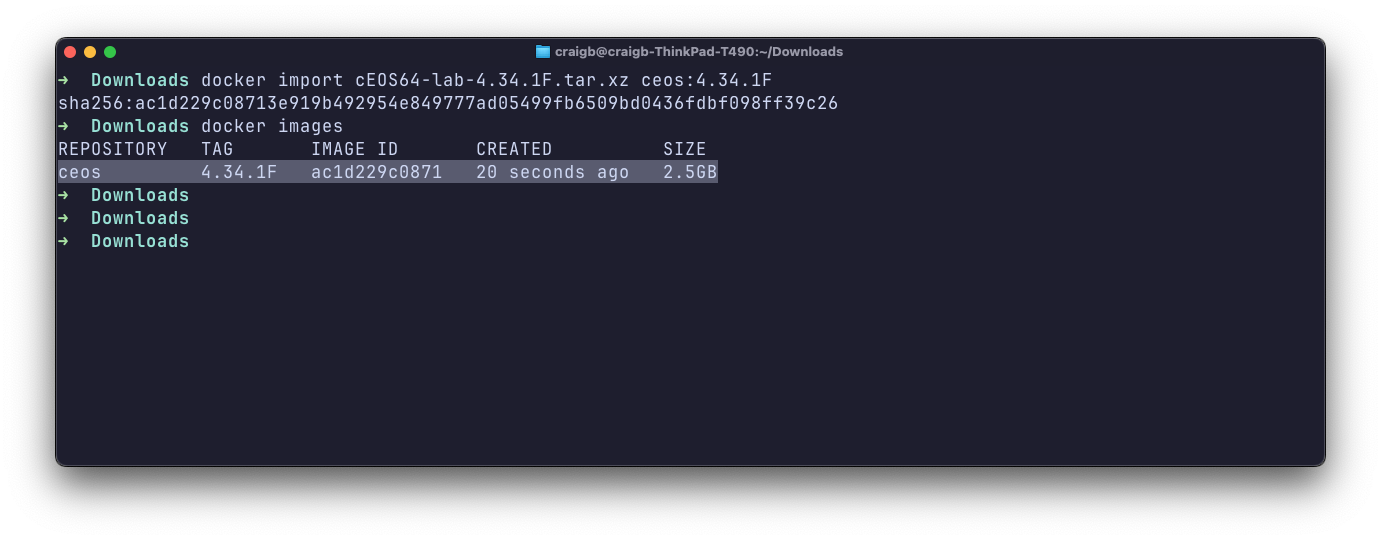
For node types which are packaged and run diretly as containers, you’ll need to retrieve the container images from the publisher. Once retrieved, there are additional steps to get a useable container image into Docker. Below is an example of acquiring Arista Containerized EOS lab image, which does require an account to access Arista’s Software Downloads.
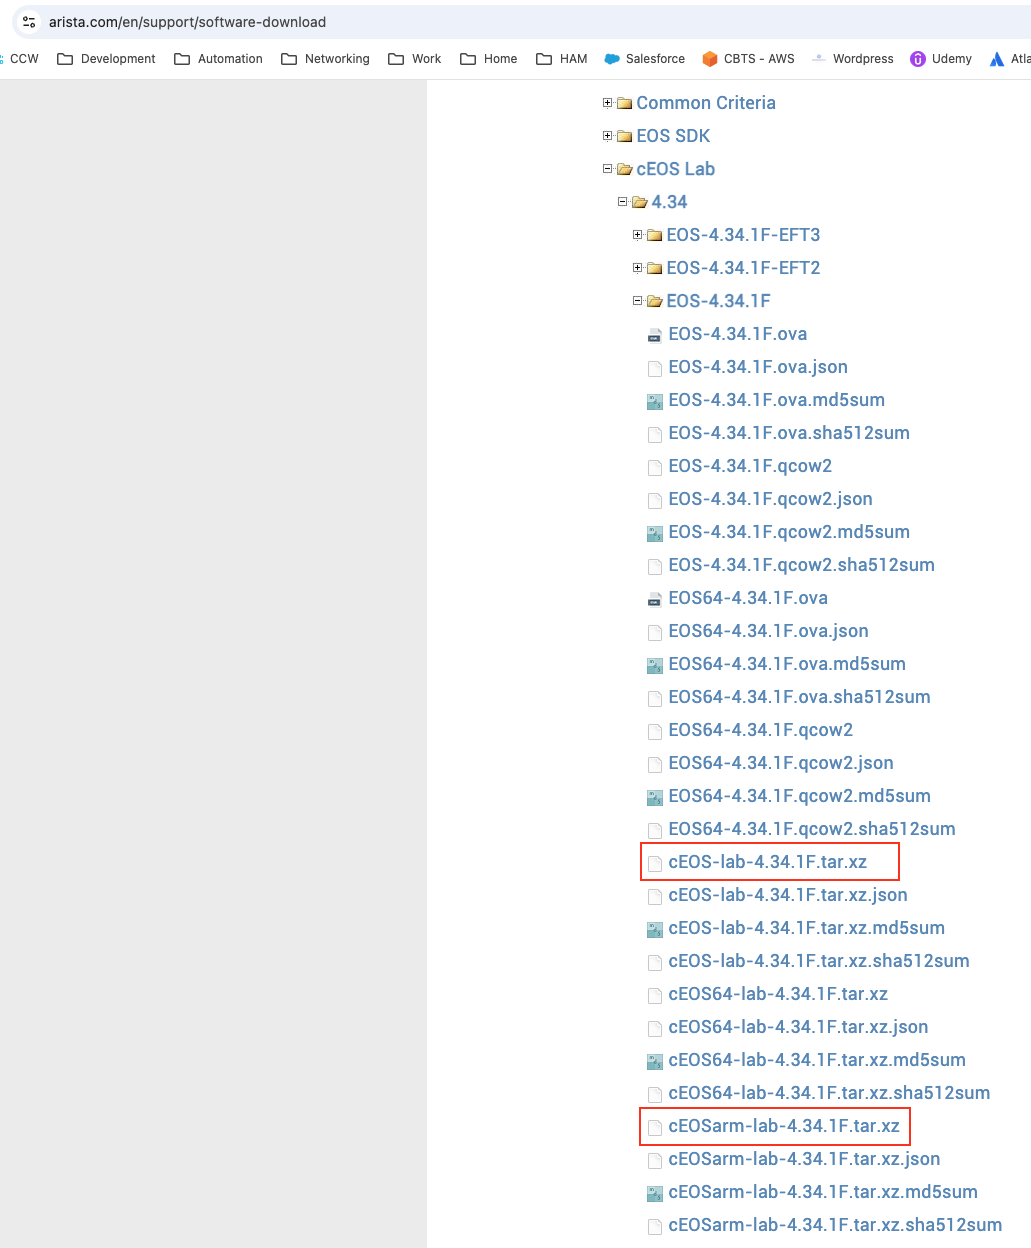
I’ve highlighted the x86 version for the x86-based Linux laptop host, and the ARM version which you’d want for an ARM-based Mac. I then import the tarball with the tag name I want so that I have a local Docker image.
VM Packaged Container Nodes#
For many node types, you’ll need to containerize them from KVM-based virtual machine images. Clone the vrnetlab Github repo from here to start. Peruse the tree structure and choose a supported node type , then go grab its KVM image. I’ll demonstrate with Mikrotik Cloud Hosted RouterOS below.
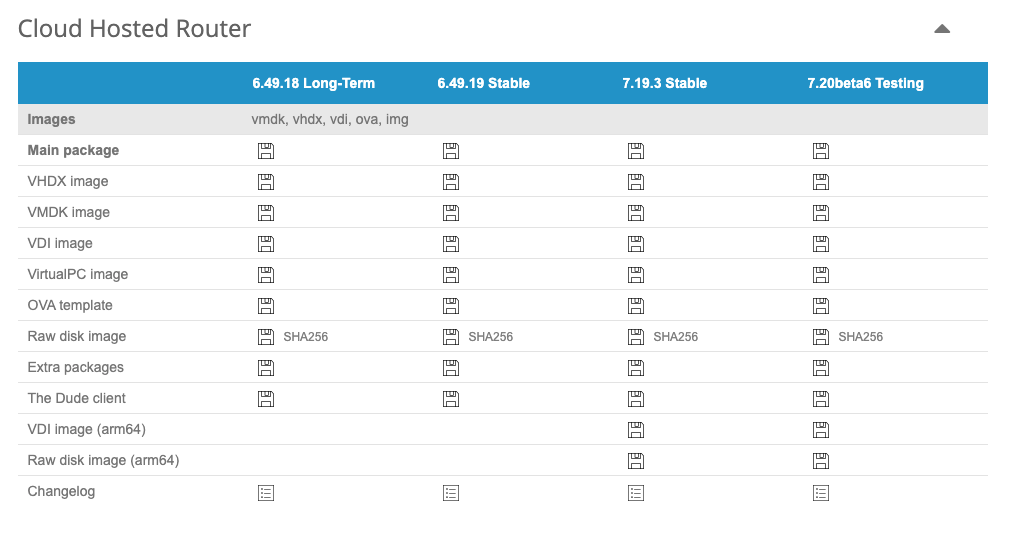
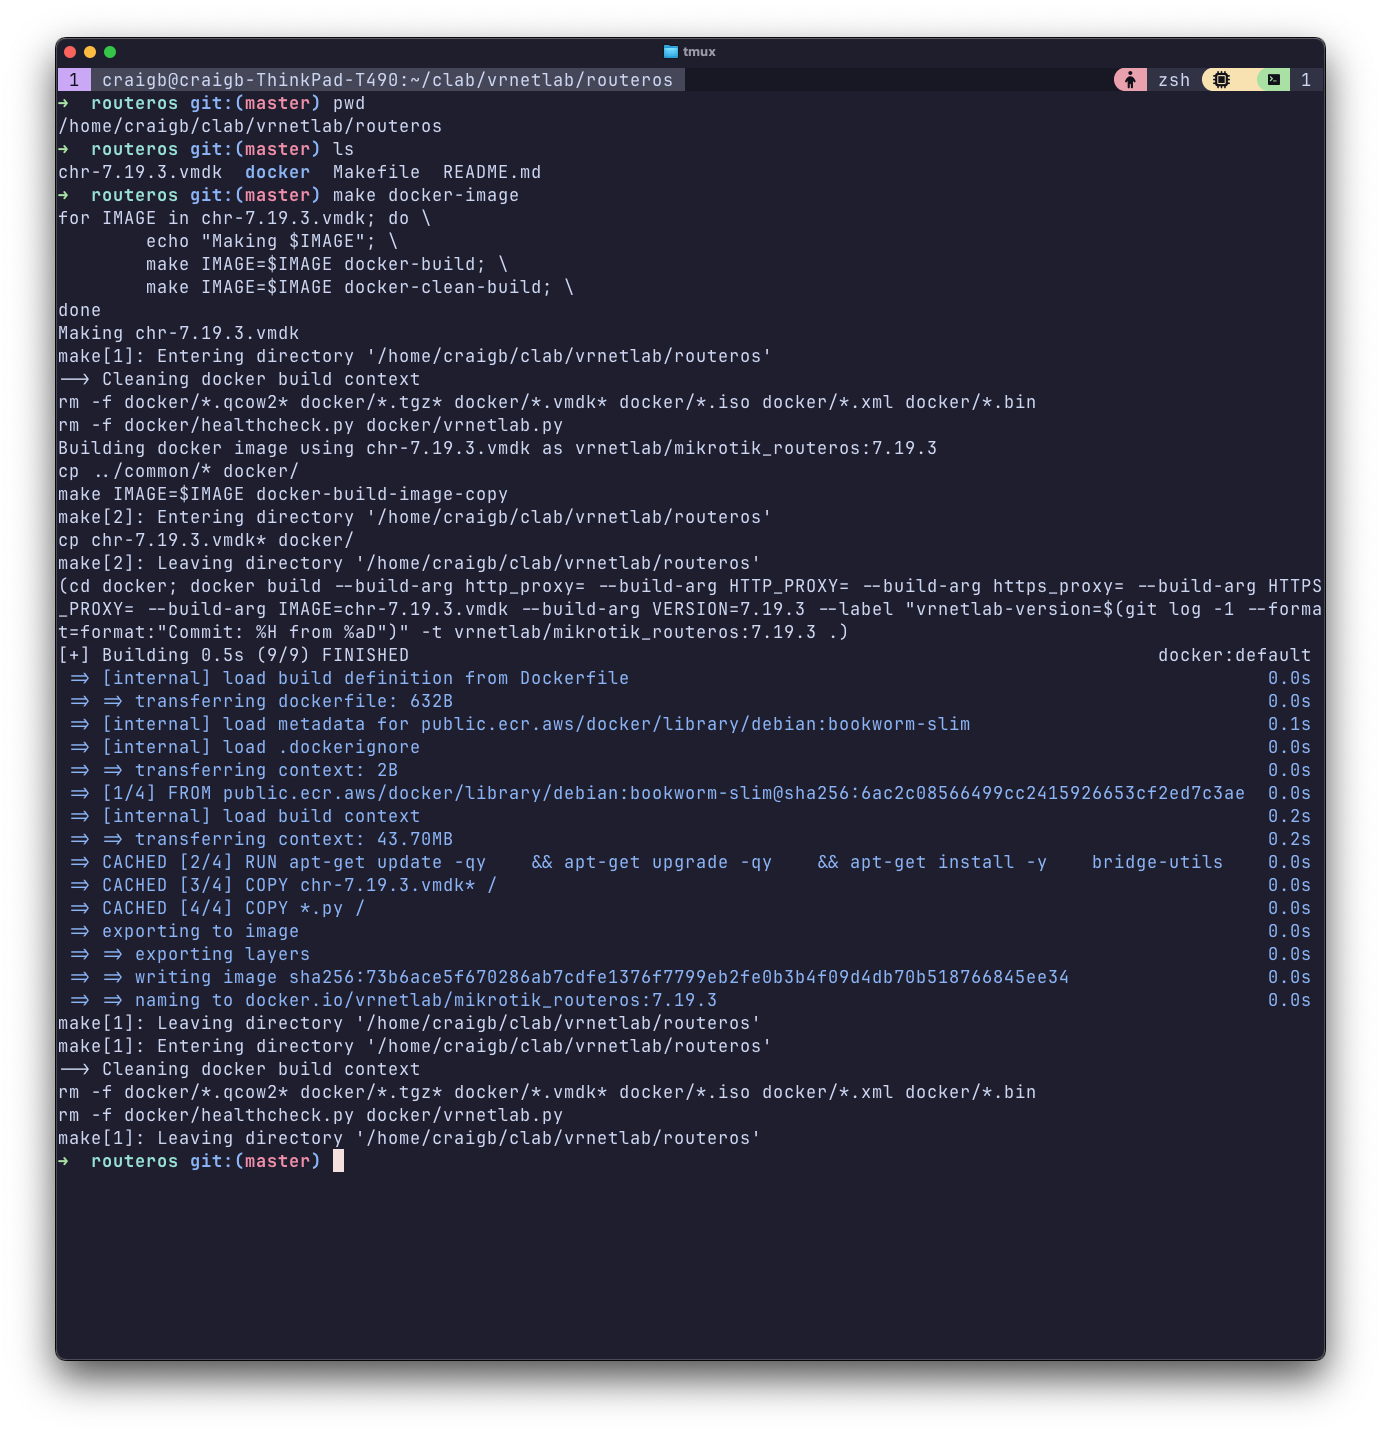
Grab the VMDK file and place it in vrnetlab/routeros, then run make docker-image per the README file and you’ll get a new Docker image called vrnetlab/mikrotik_routeros.
Lab Topologies#
Containerlab uses YAML to define each given lab topology you want to build. These topology files contain all the nodes, their hostnames, Docker image to be used, how interfaces should be interconnected, and other attributes.
I like to organize my lab topology files like ~/clab/<lab-name>.clab.yml. The naming convention saves me from having to specify the topology as a command line argument when starting a lab. When a lab is launched, it will get its own namespace and a directory structure will be created to store things like config files and ansible inventory. I also set some attributes in the topology file to my liking.
Simple Example#
# blog-example.clab.yml
name: blog-example
prefix: ""

topology:
  defaults:
    # Setting ROS as default kind
    kind: mikrotik_ros

  kinds:
    ceos:
      image: ceos:4.34.1F
    mikrotik_ros:
      image: vrnetlab/mikrotik_routeros:7.19.3

  nodes:
   ros-1:
   # kind will inherit default if unspecified
   eos-1:
    kind: ceos

  links:
    - endpoints: ["eos-1:eth2", "ros-1:ether2"]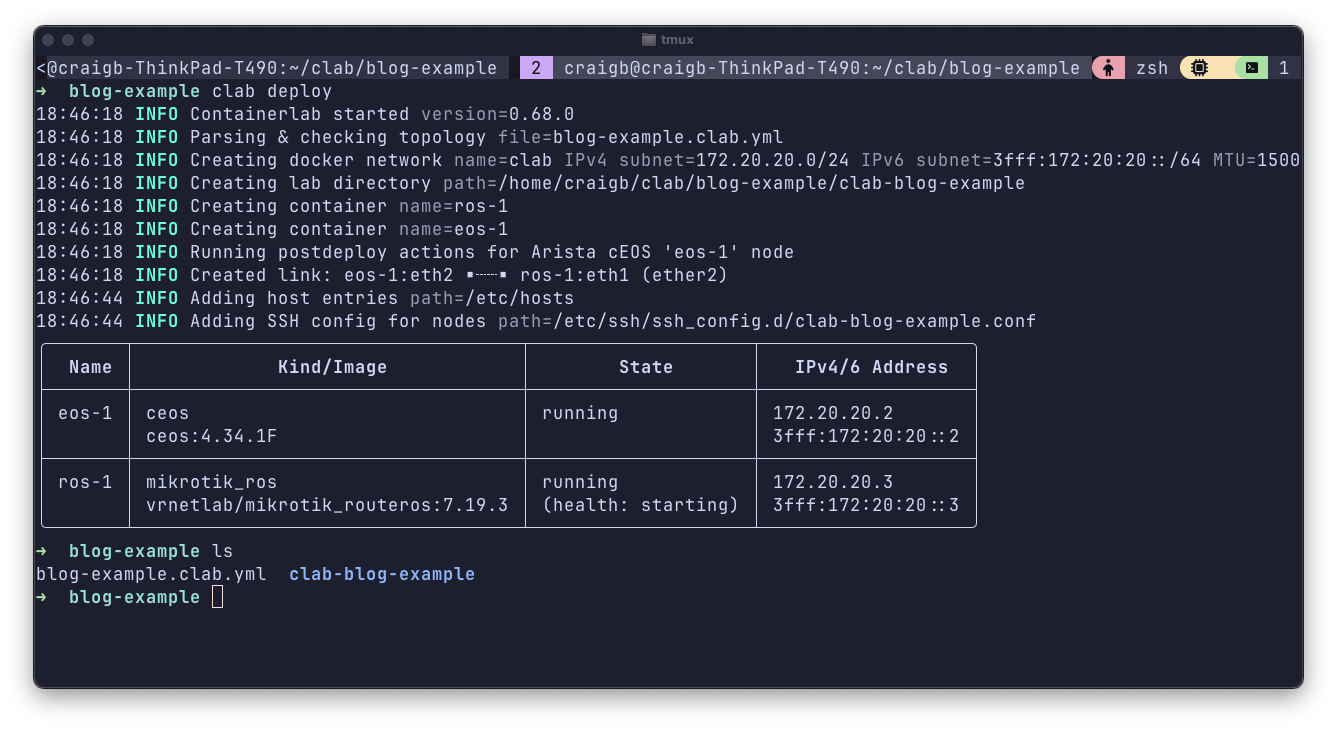
By setting prefix: "", my nodes get named how I like them and their hostnames are available to easily SSH into. You can also see the directory structure getting created underneath the directory where I store the topology file. Different node types will have different interface naming conventions. In the case of this example, CEOS interfaces are named ethXX and RouterOS interfaces are etherXX, respectively.
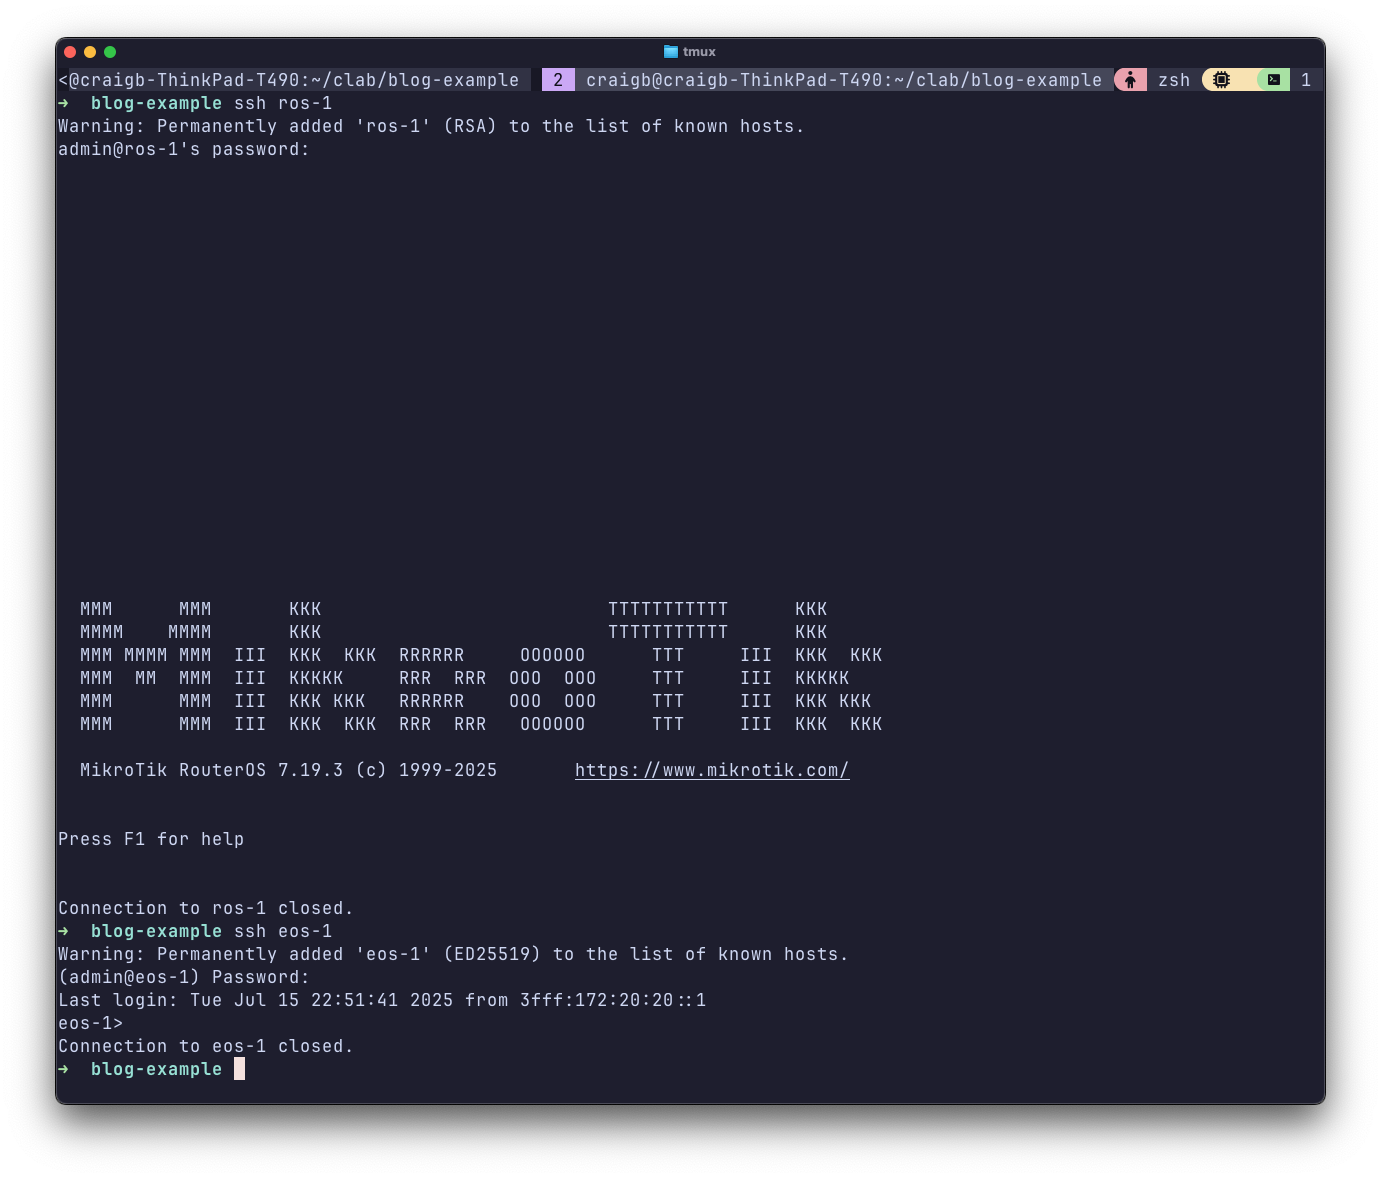
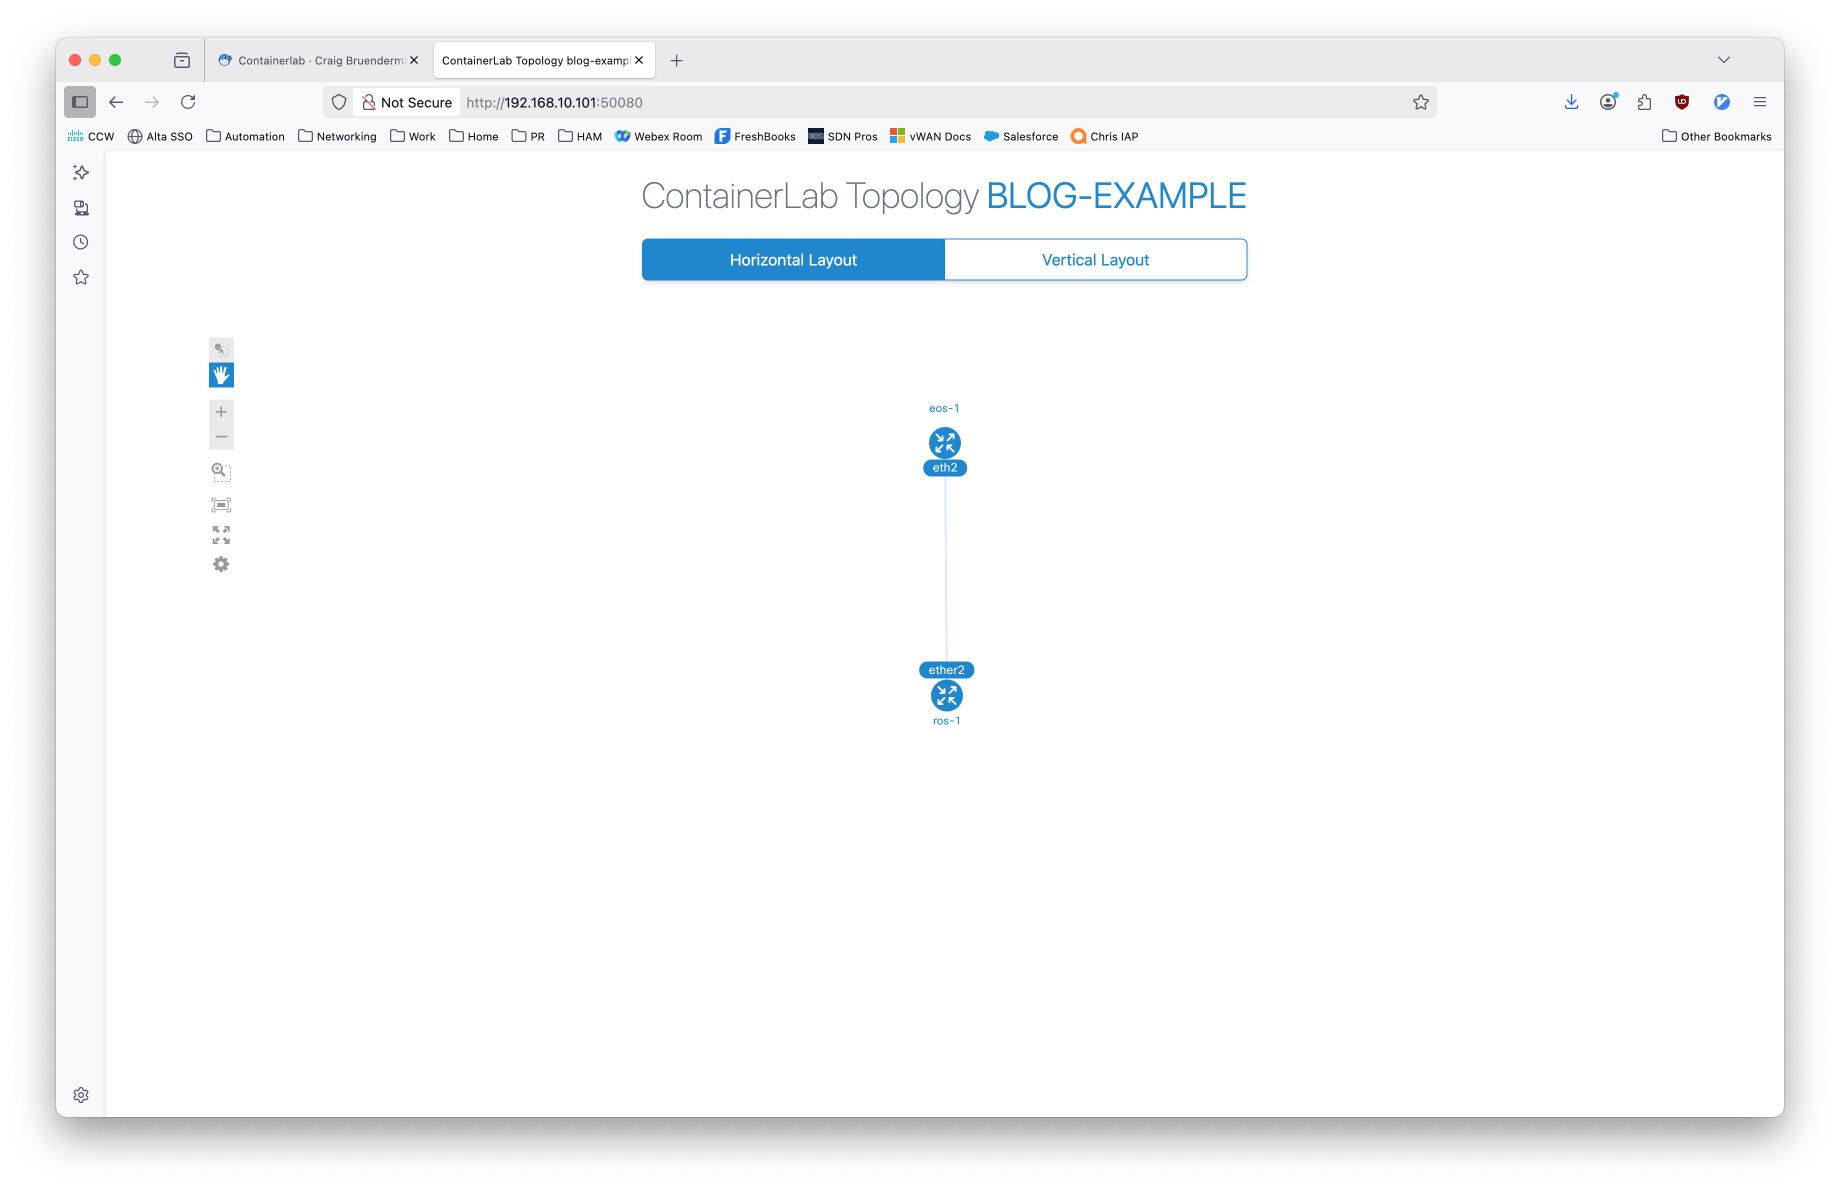
As you can see, I was able to SSH directly into both nodes by their short hostname, which was dynamically added to my laptops hosts file when I started clab. Running clab graph will run a local webserver and generate a visual depiction of the topology.

Expanded Example#
Let’s make the example a bit more interesting by adding another CEOS node (ceos-2), and a link between it and ceos-1. Simply edit the topology file and issue appropriate clab' commands. You can clab destroyand thenclab deploy, or just clab redploy`.
  links:
    - endpoints: ["eos-1:eth2", "ros-1:ether2"]
    - endpoints: ["eos-1:eth3", "eos-2:eth3"]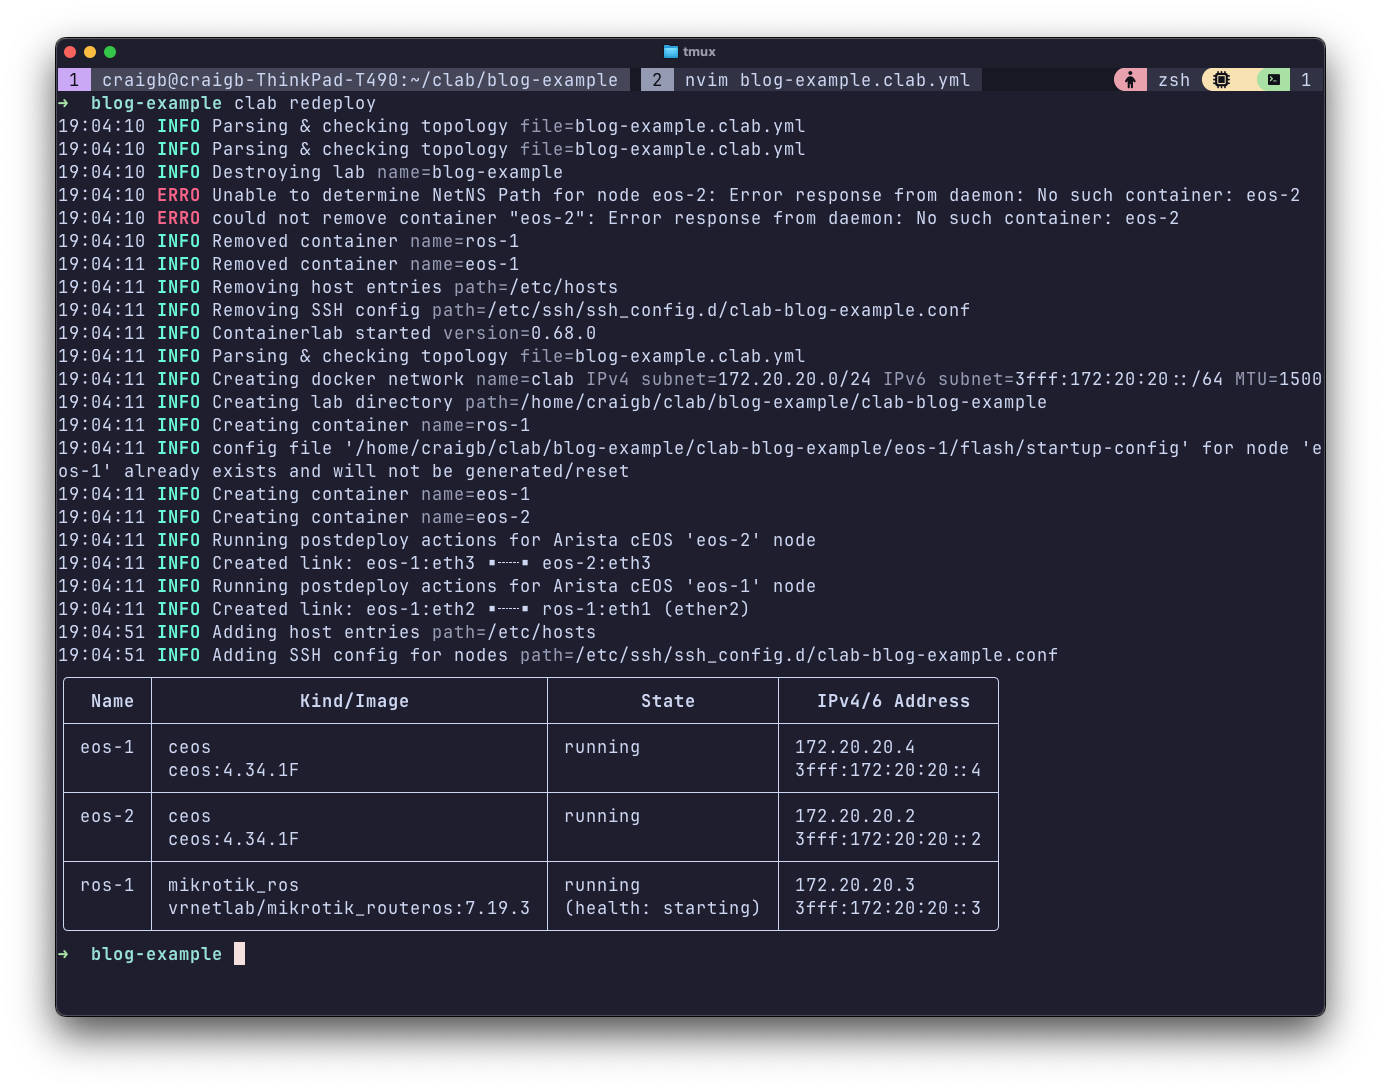
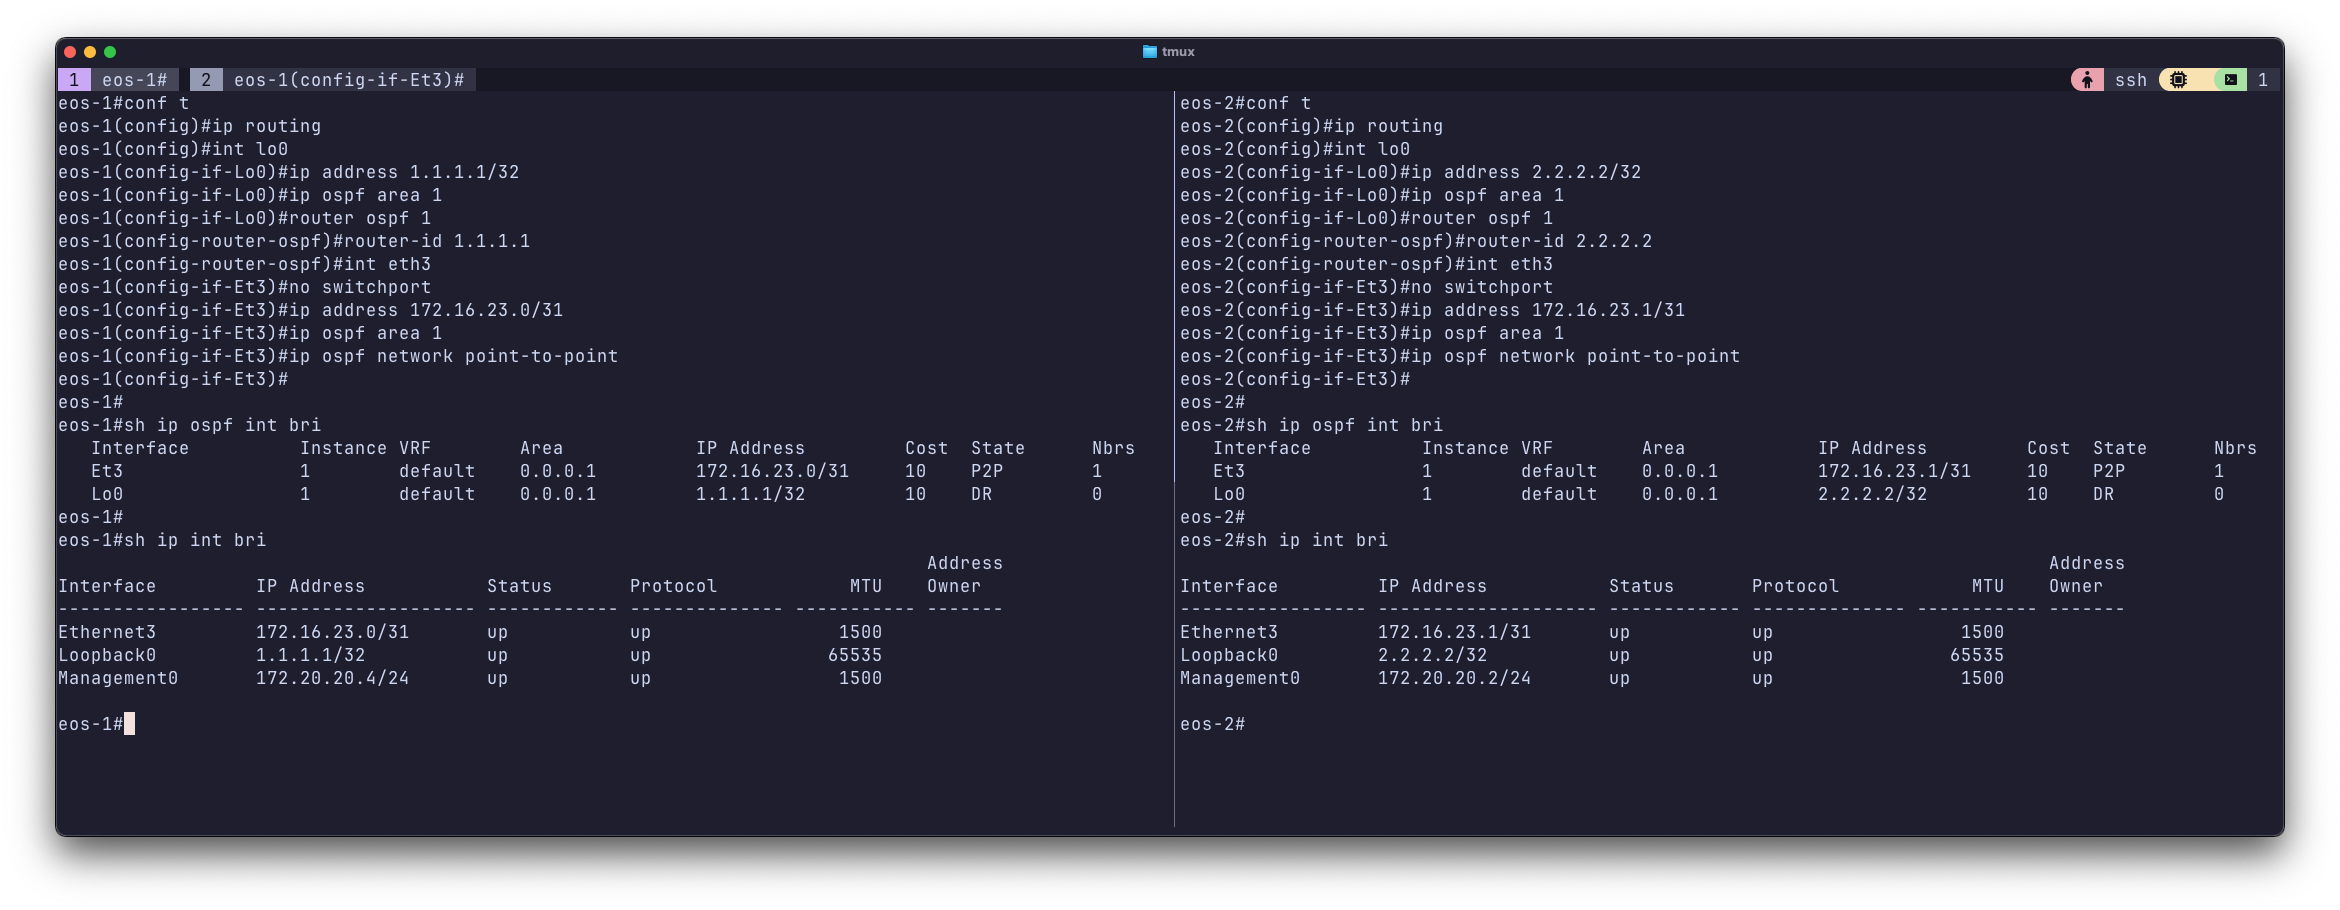
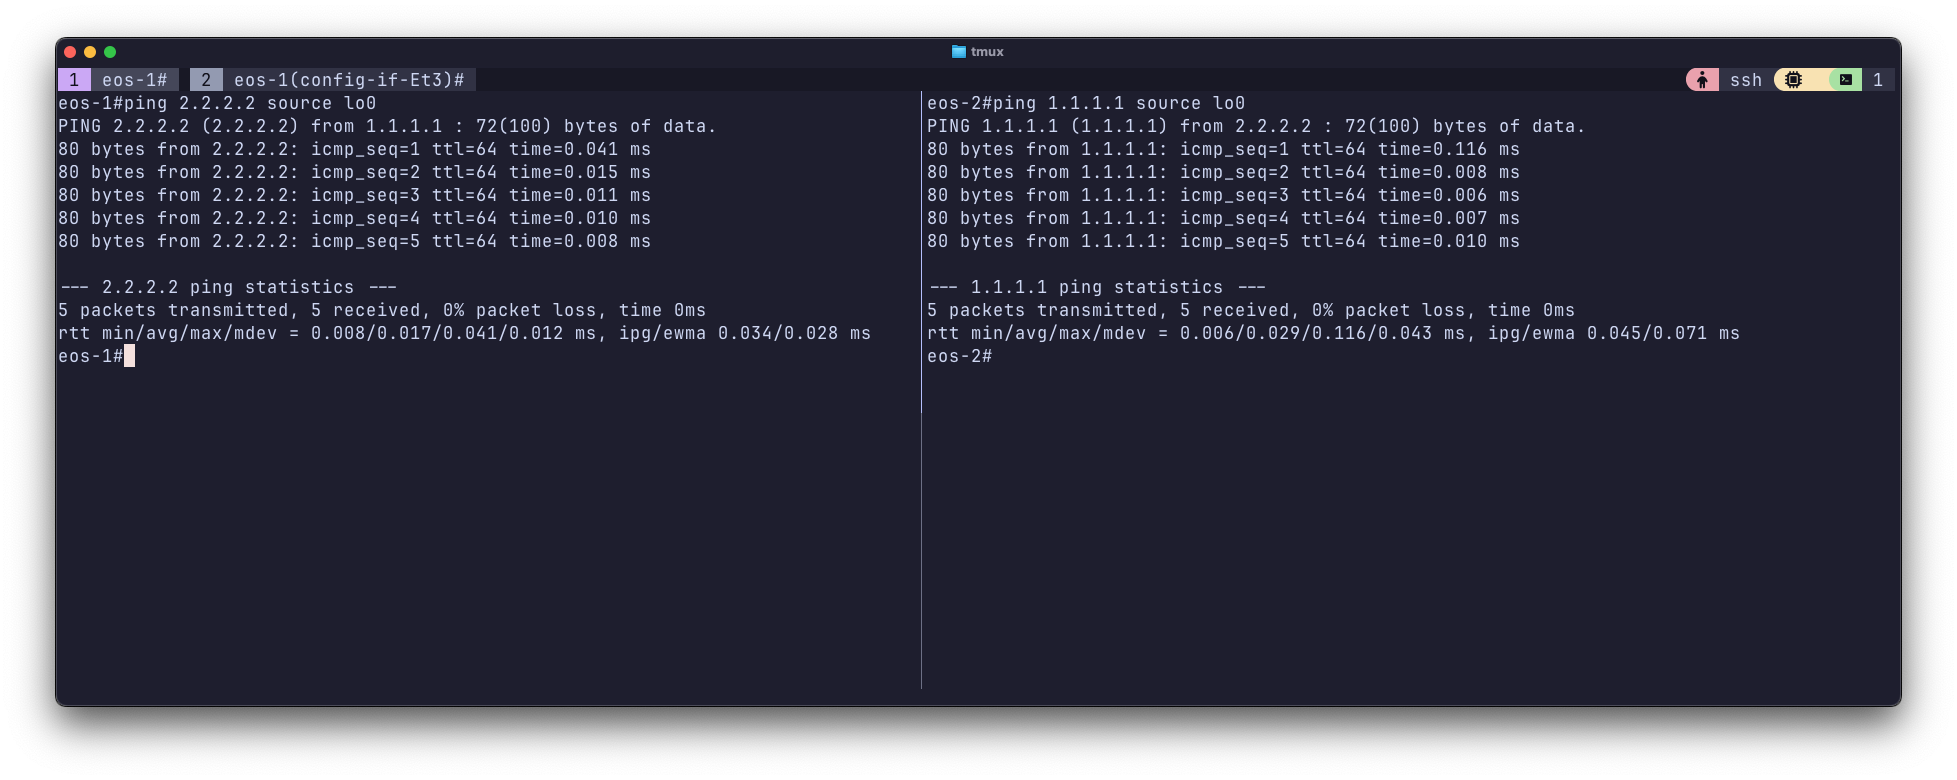
Now I’ll throw some simple OSPF configuration in.
Conclusion#
Containerlab is awesome. It is the basis for a good programmatic labbing workflow and has a lot more potential than I’ve shown in this introductory post. Maybe I’ll get around to making this a multi-part series. Two cool uses I’ve seen for clab are linked below and showcase a lot more of its power than I have here.